
Welcome to Fedica’s affiliate program! This guide will walk you through setting up your affiliate account and getting your content calendar filled with posts that can start letting you earn.
Step-by-Step Setup Guide
Step 1: Access Your Affiliate Assets
Not an affiliate?
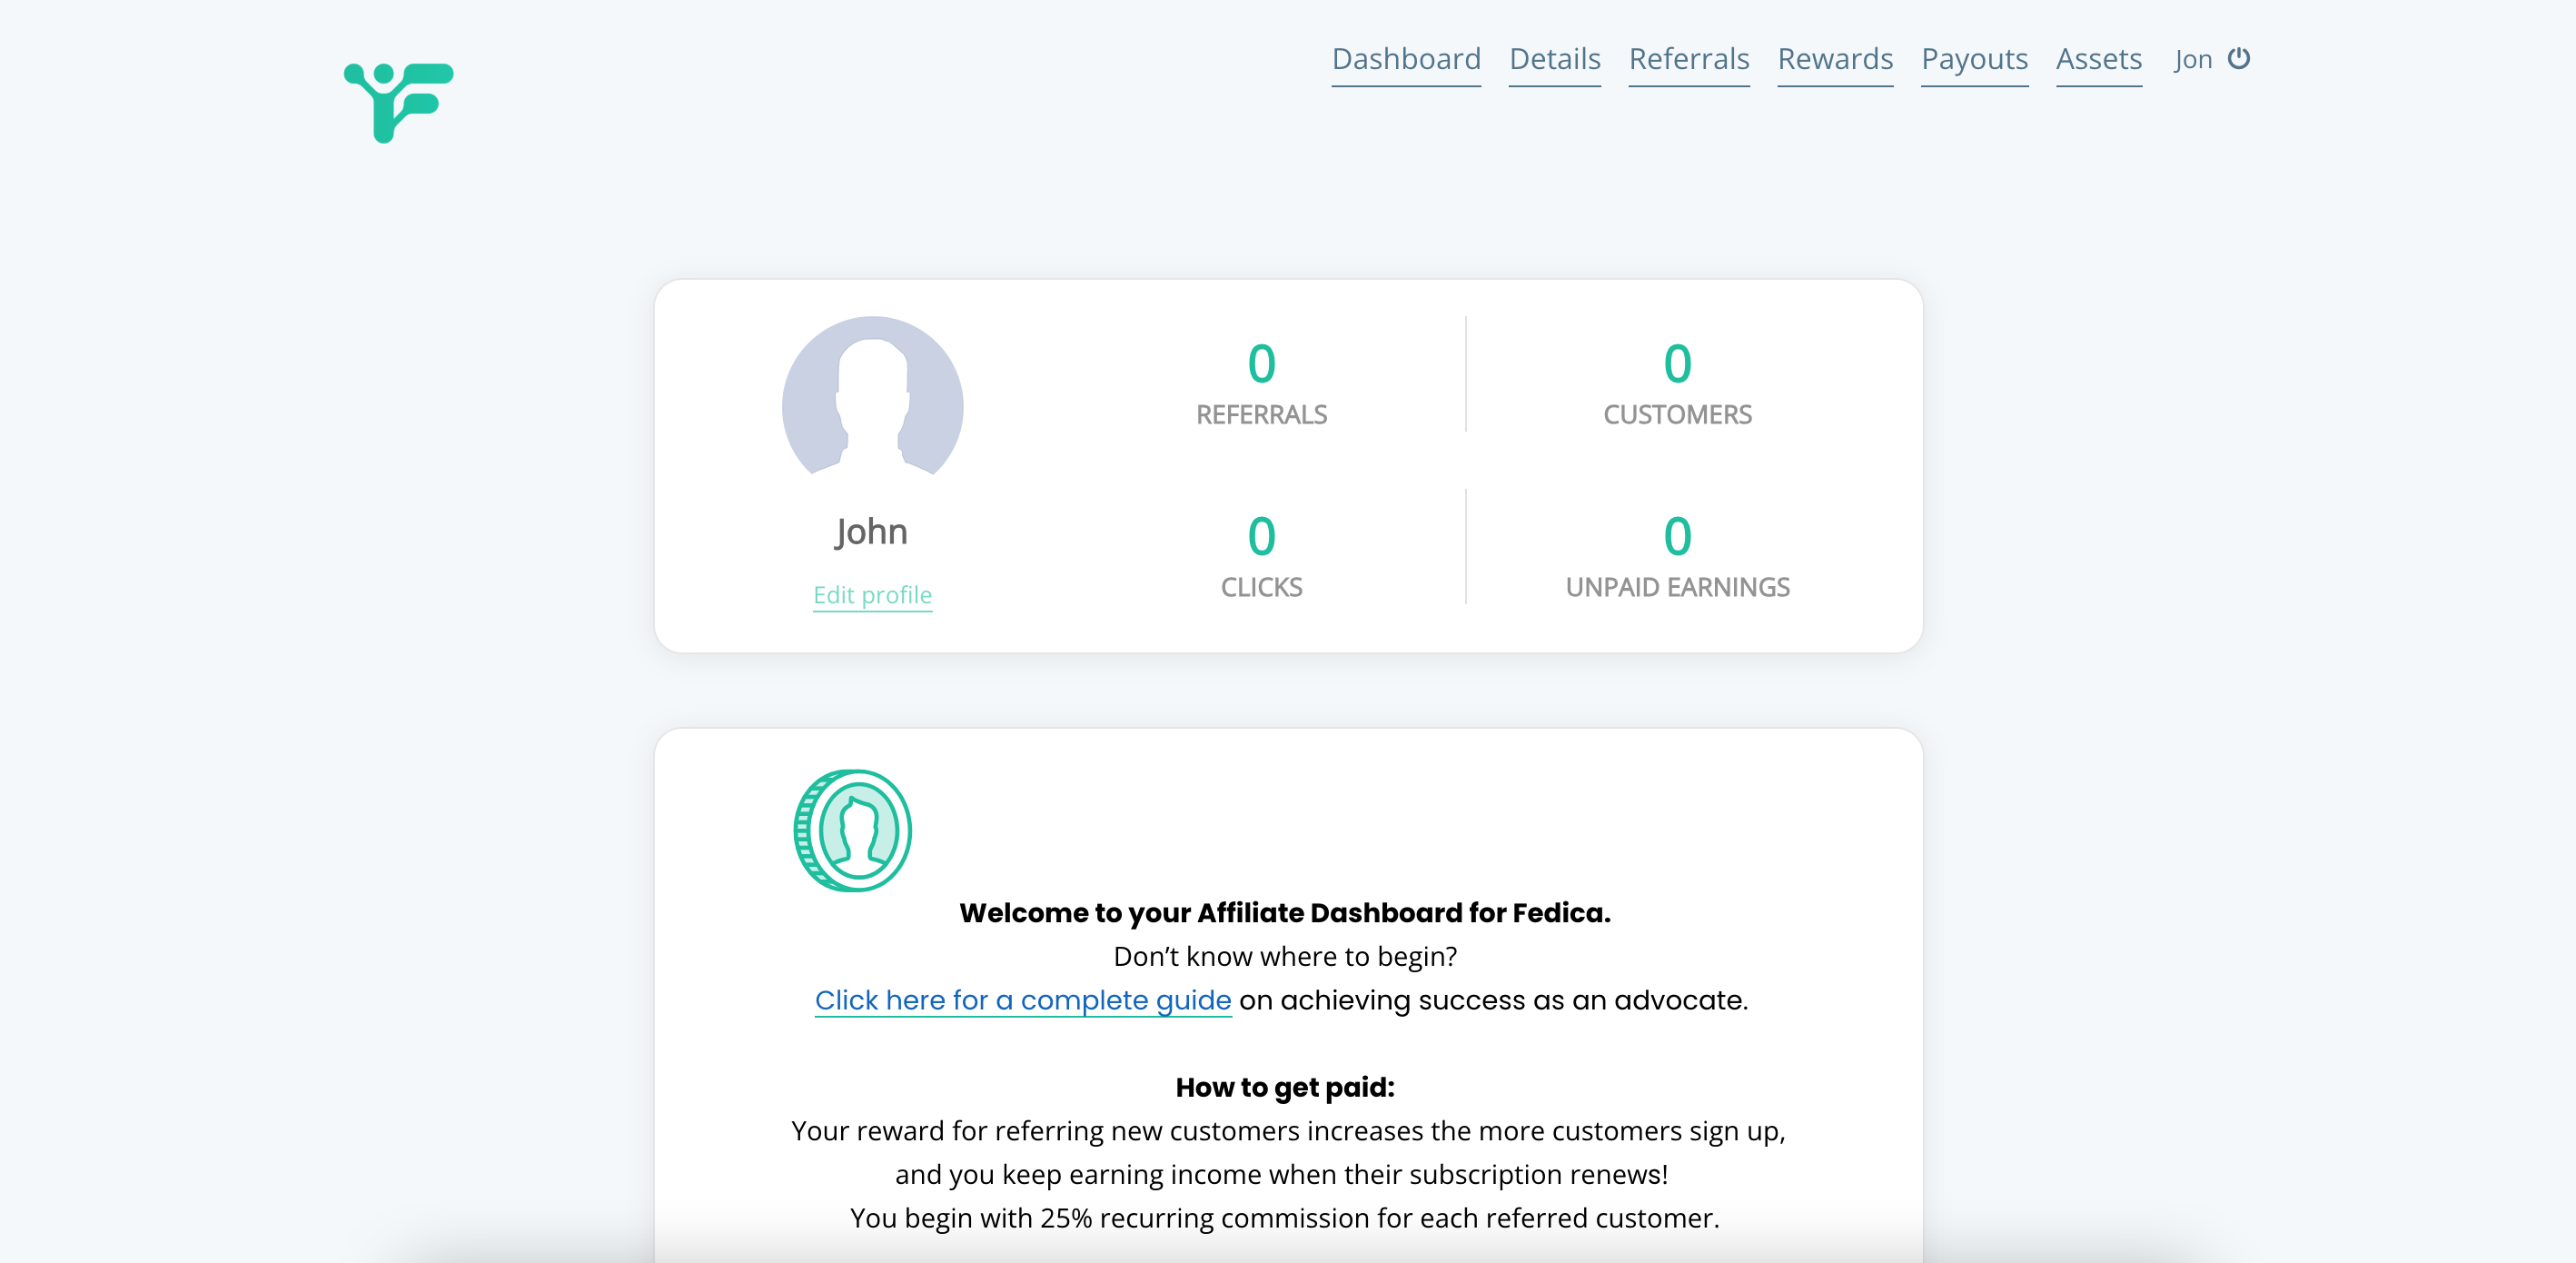
Visit your affiliate dashboard in the welcome email you recieved when signing up.
This is where you’ll find a variety of assets to use, including bulk upload CSV files that allow you to one-click fill your drafts, Pipeline, or calendar with pre-written posts.
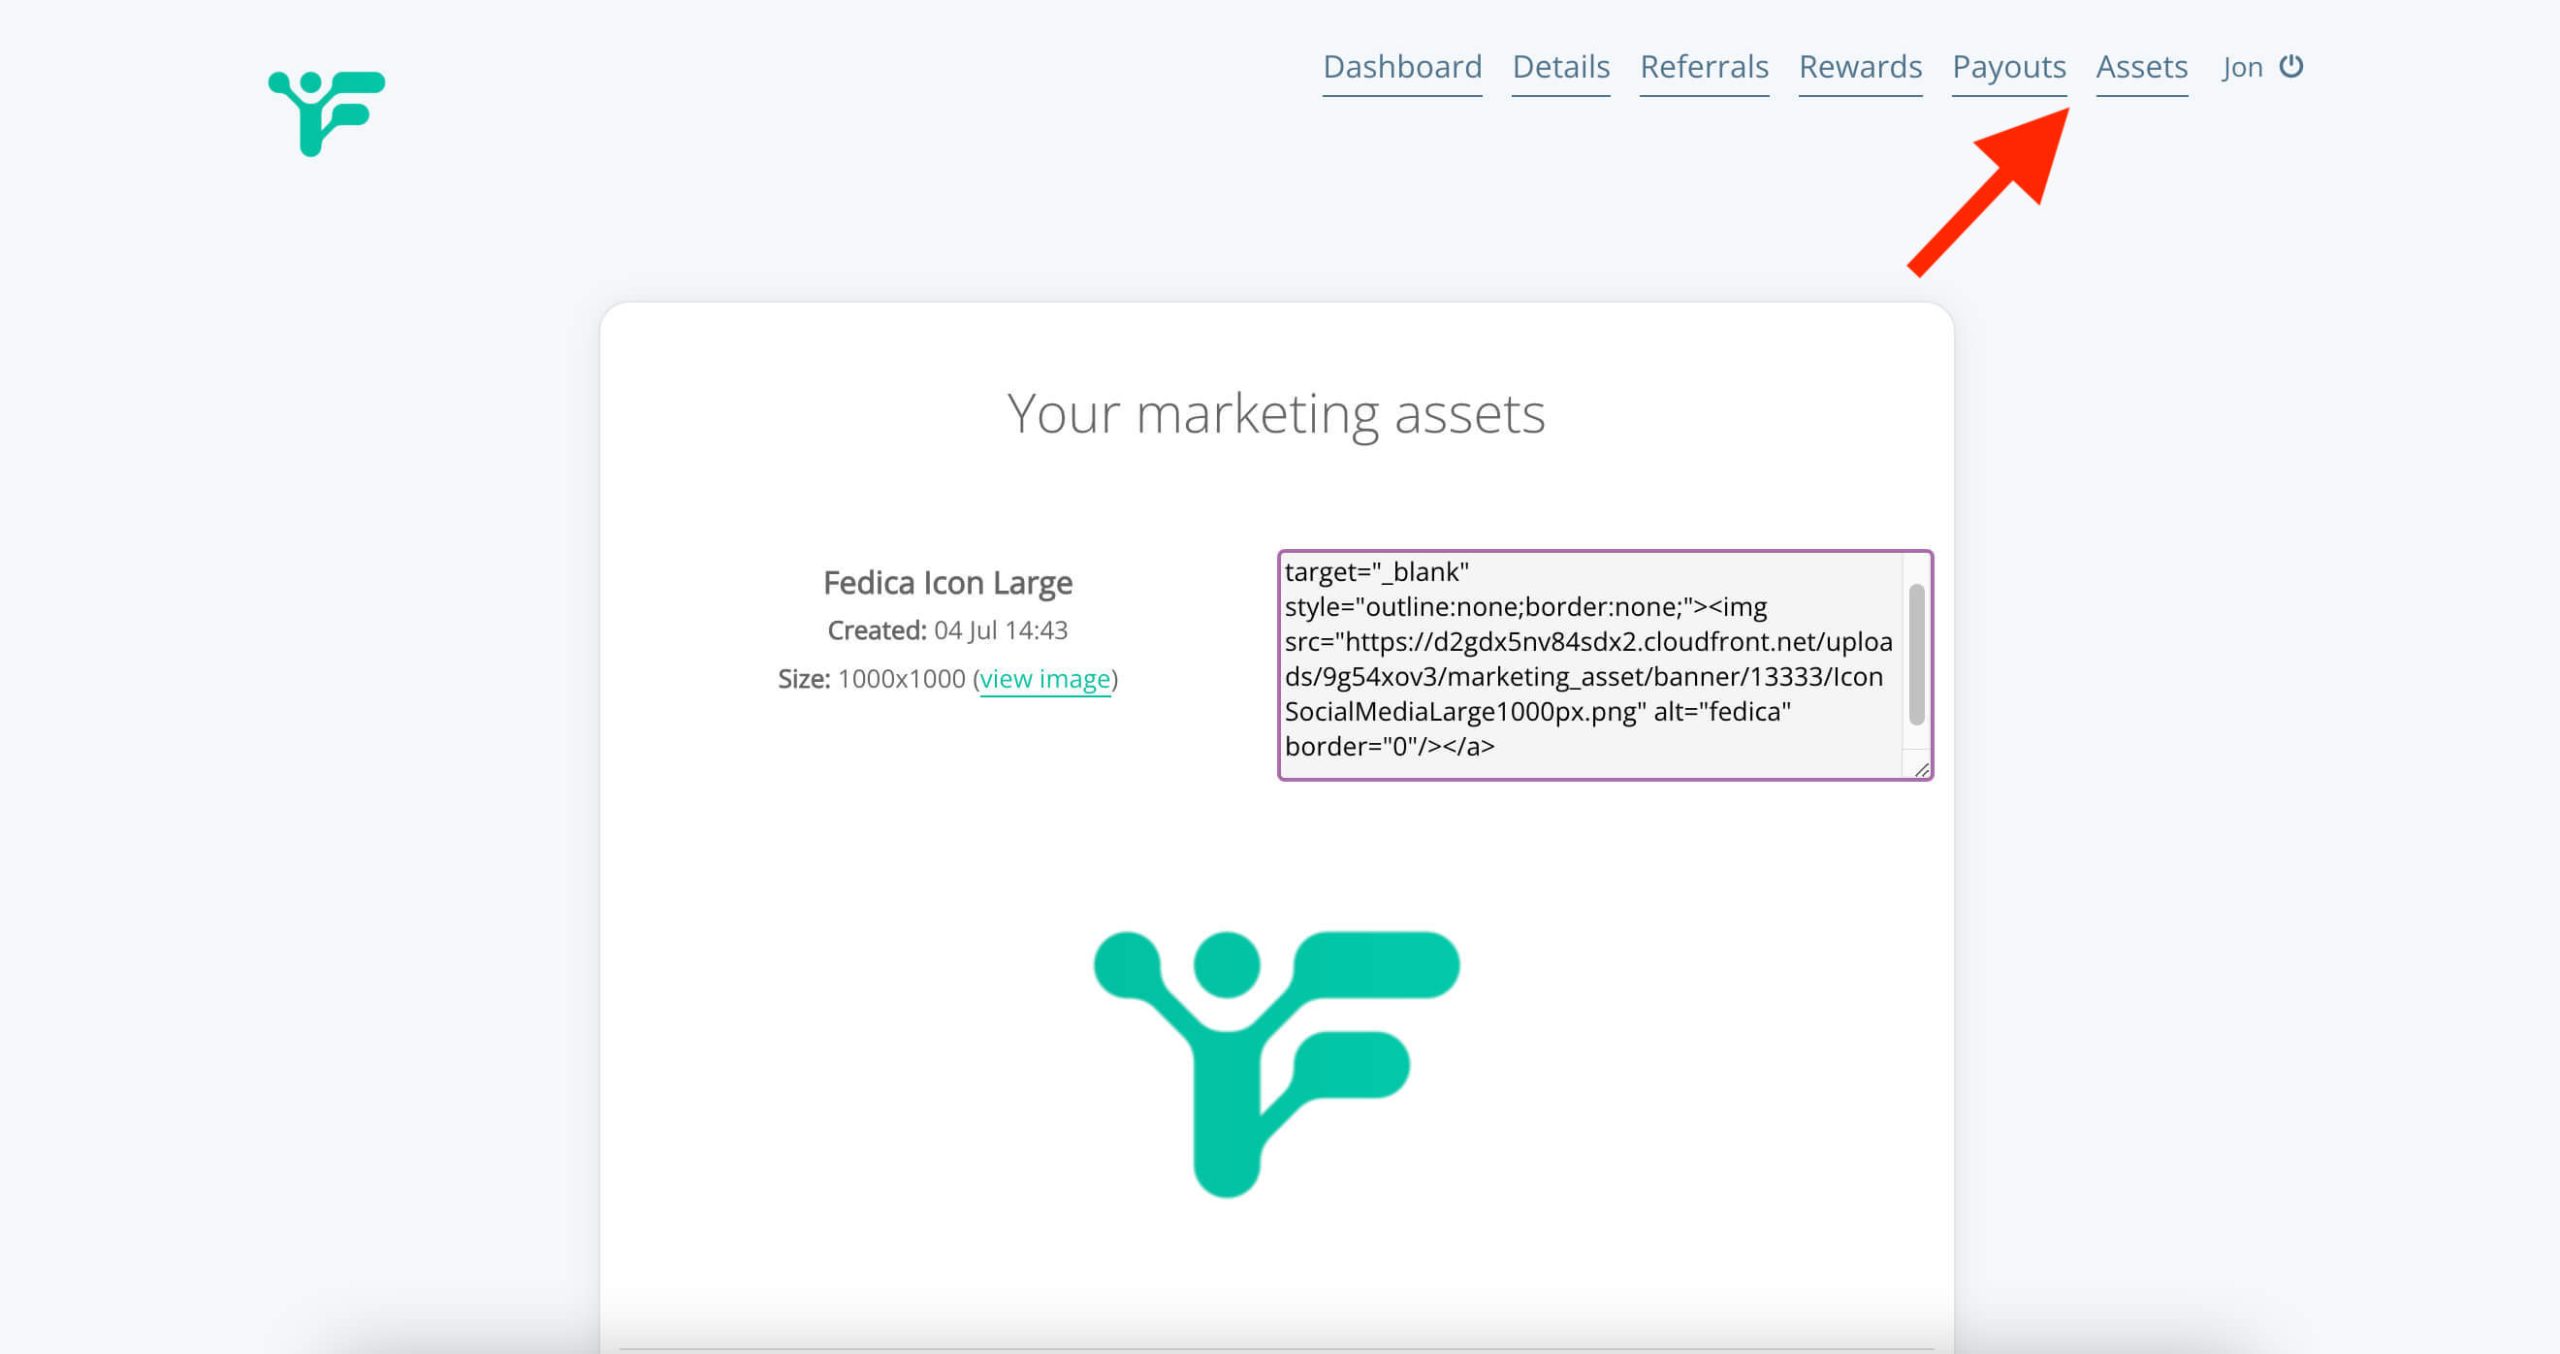
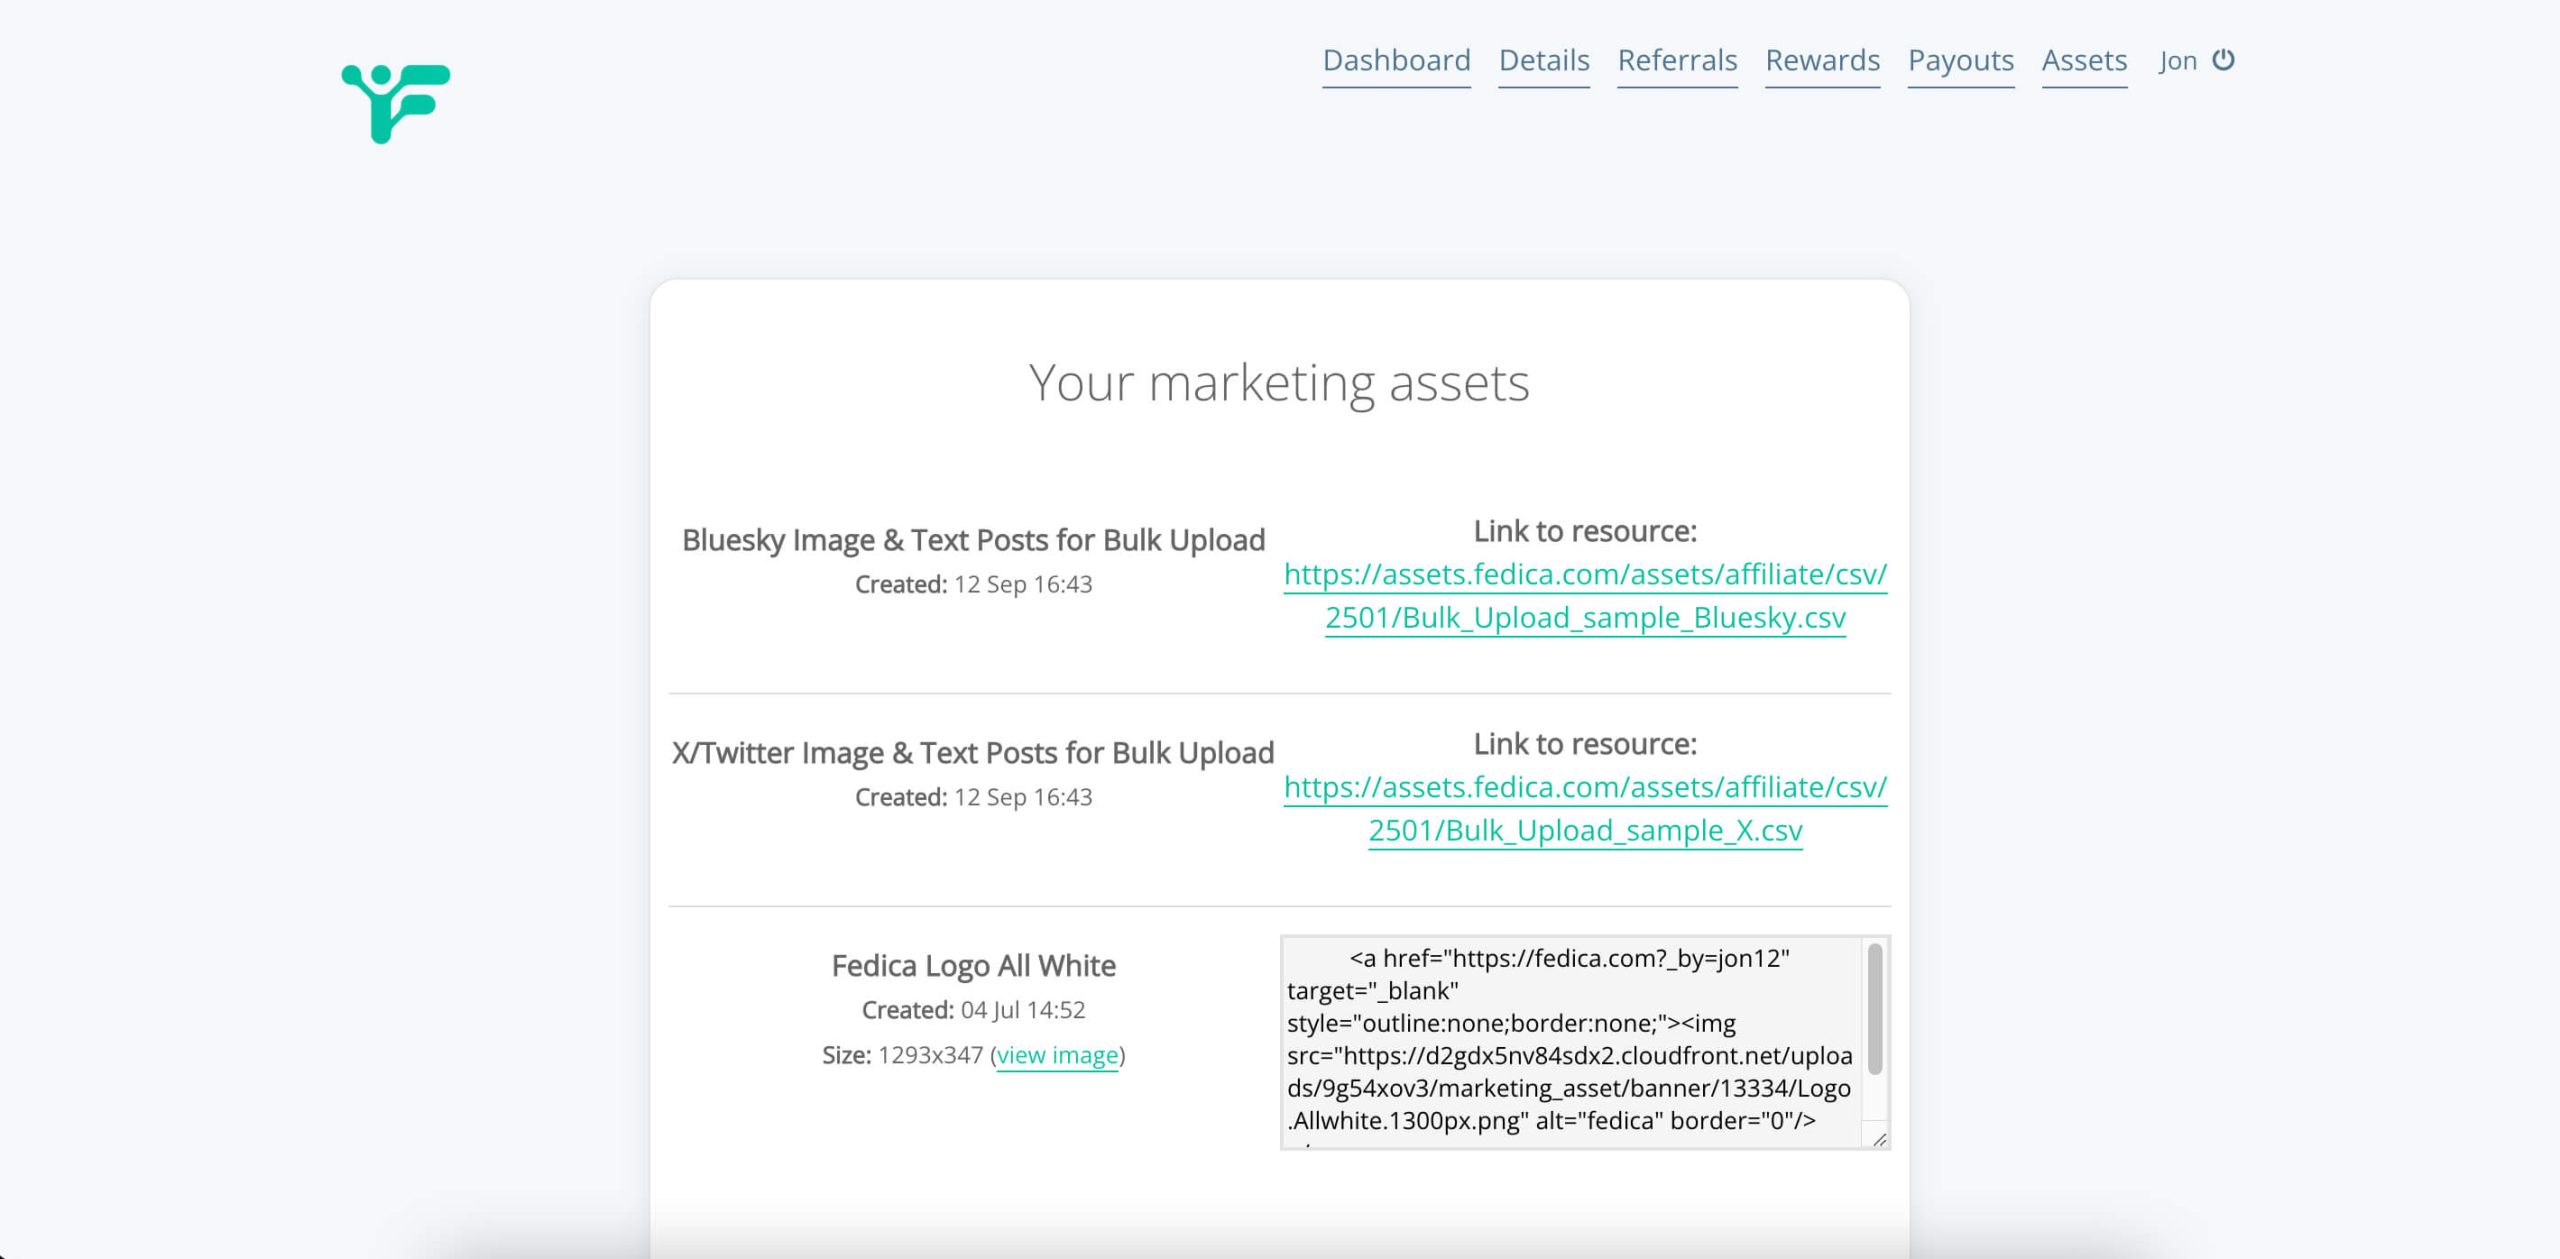
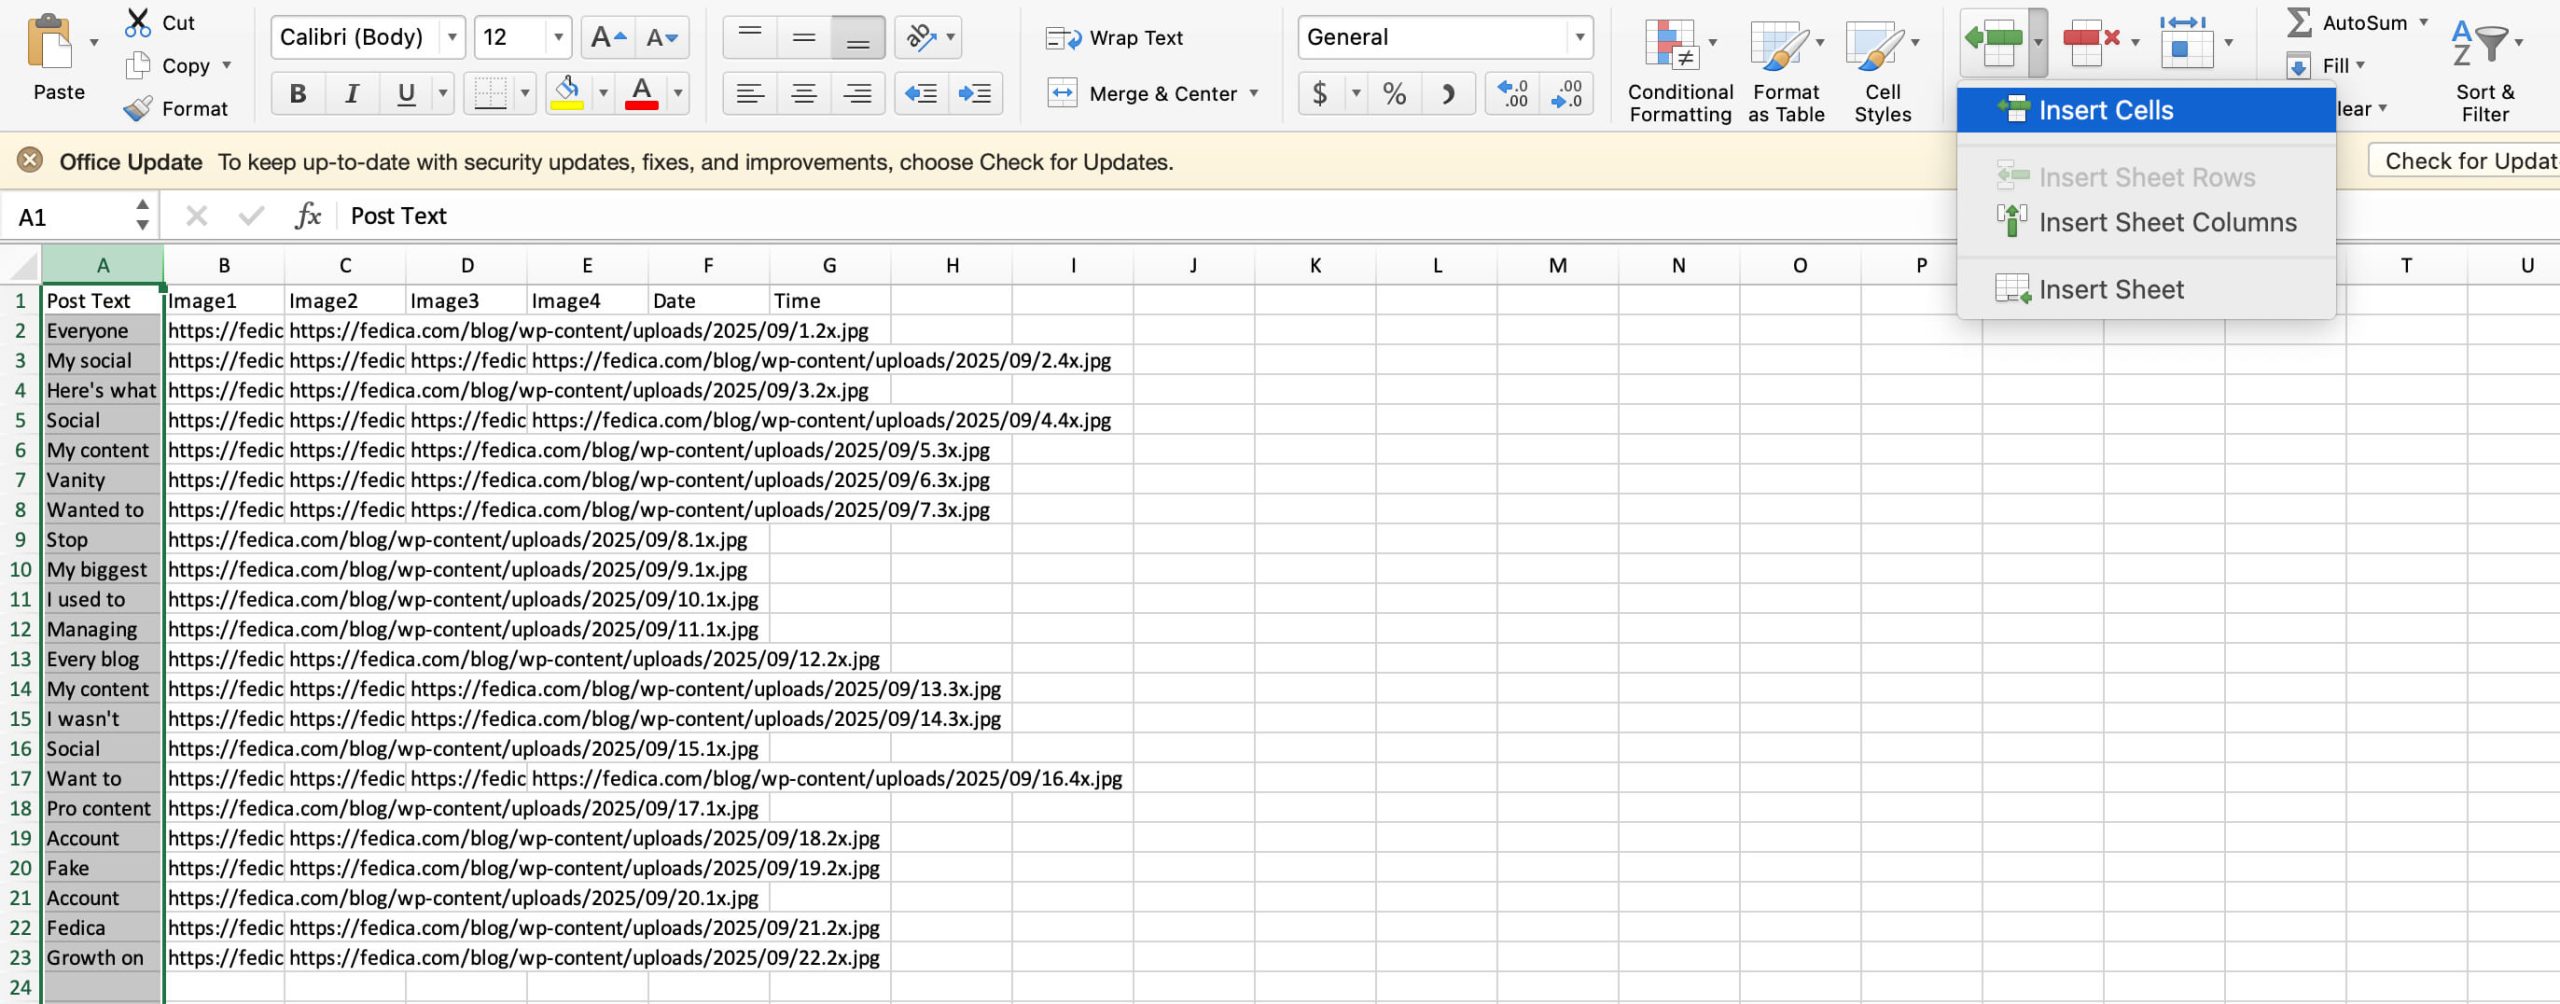
Here is where you will find some spreadsheet CSV files with
pre-written posts you can use to bulk upload to Fedica:
After downloading these files you can upload them with bulk upload tool. Instead of manually adding each time to post, use content Pipeline queues. Just set up a pipeline with a schedule, and voila!
Here’s how to set up a Pipeline and fill your calendar:
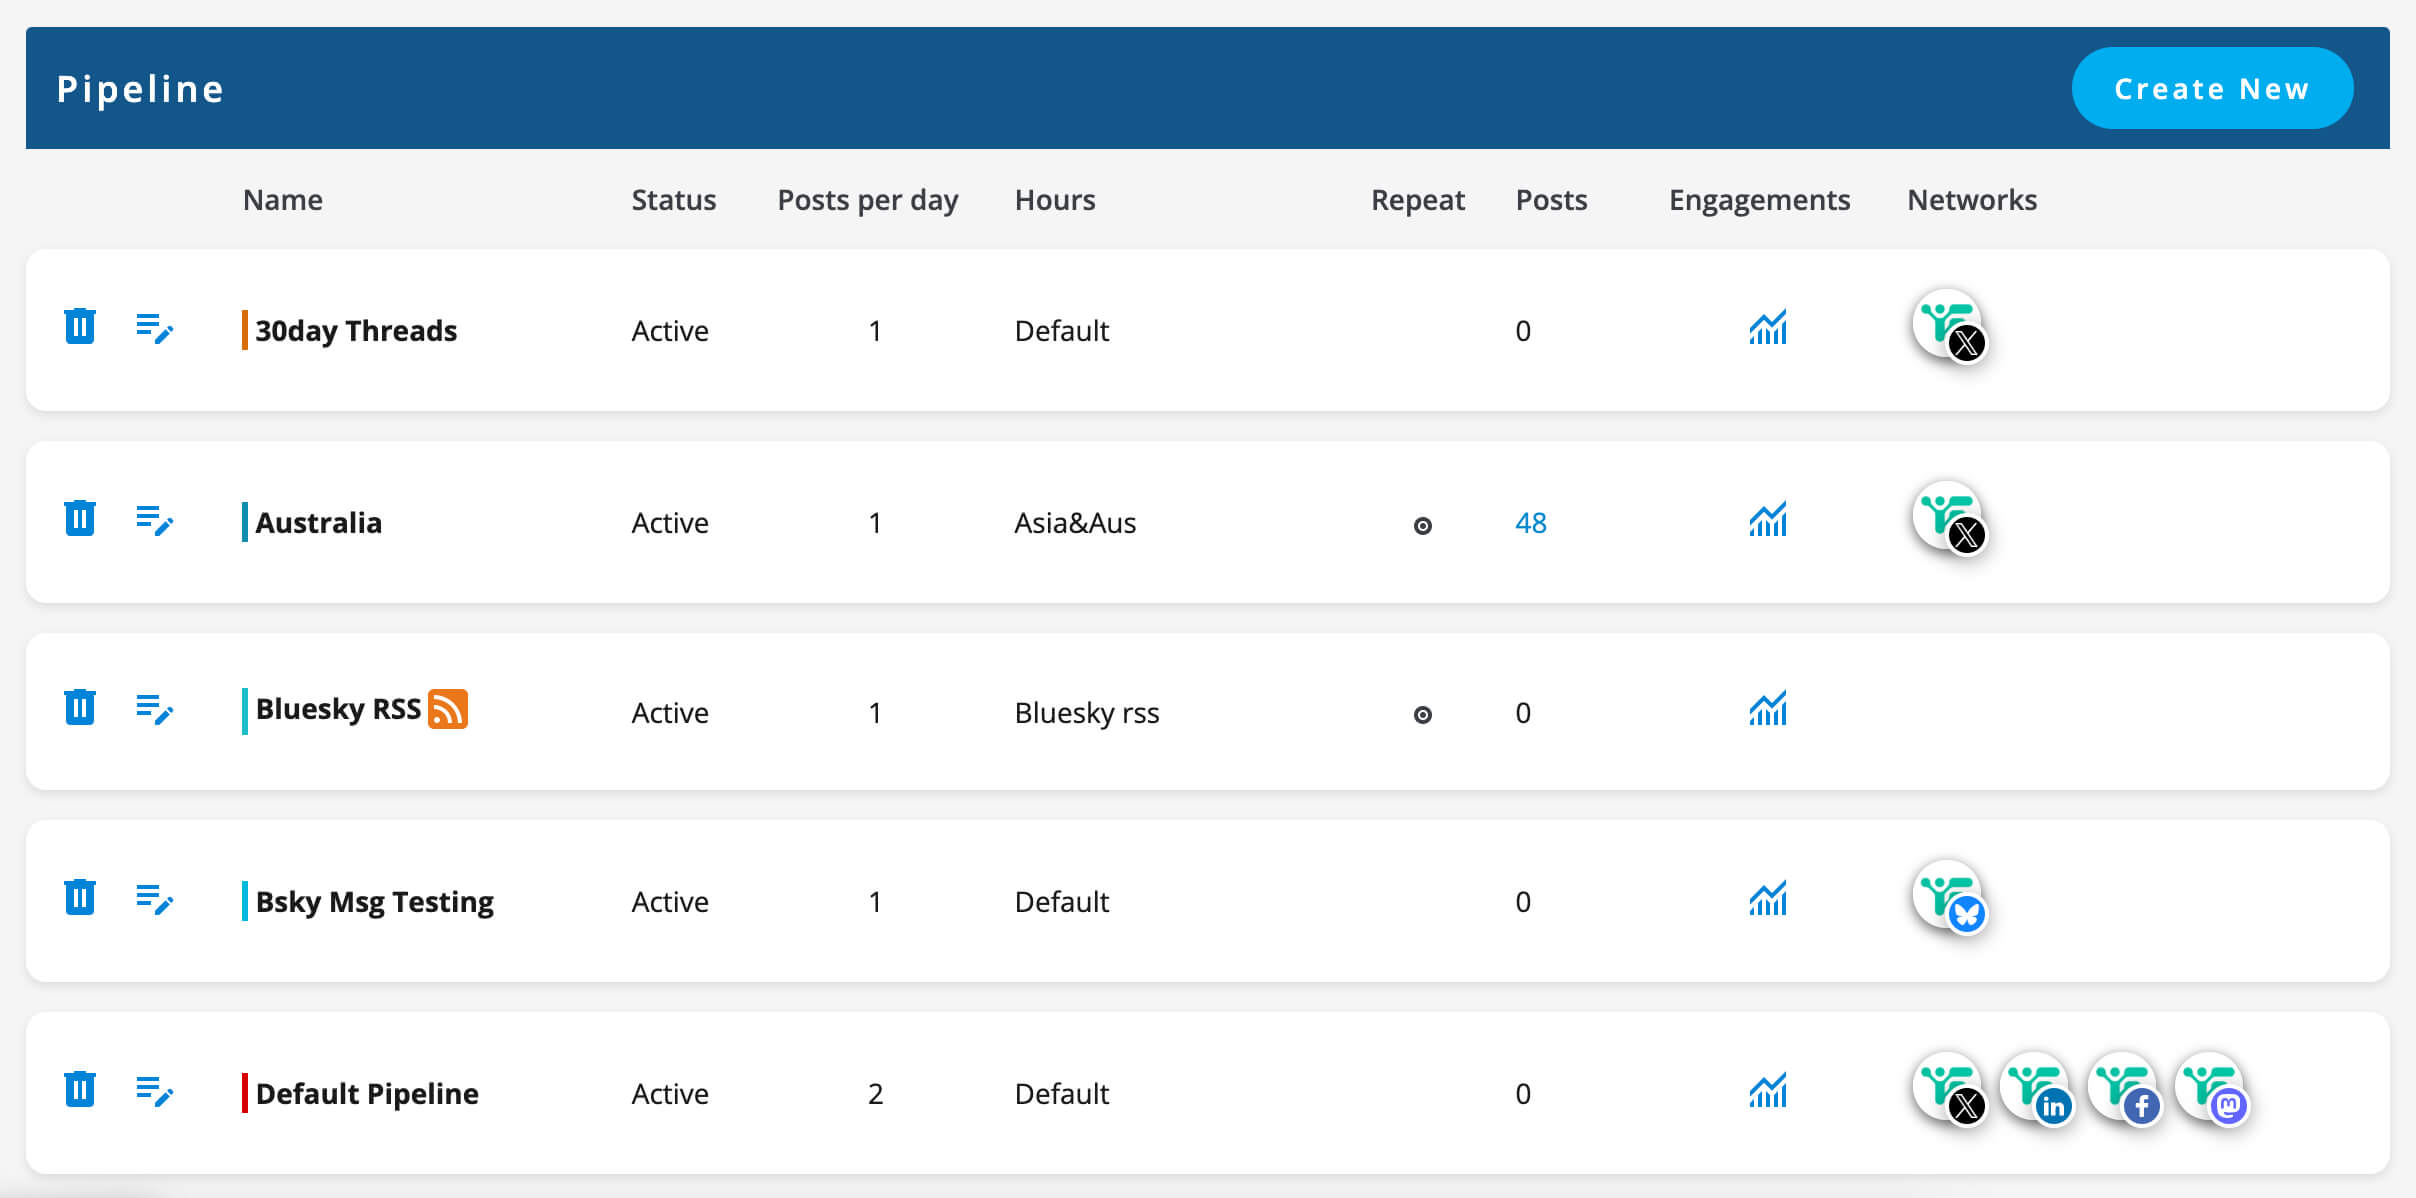
Step 2: Open the Pipelines page.
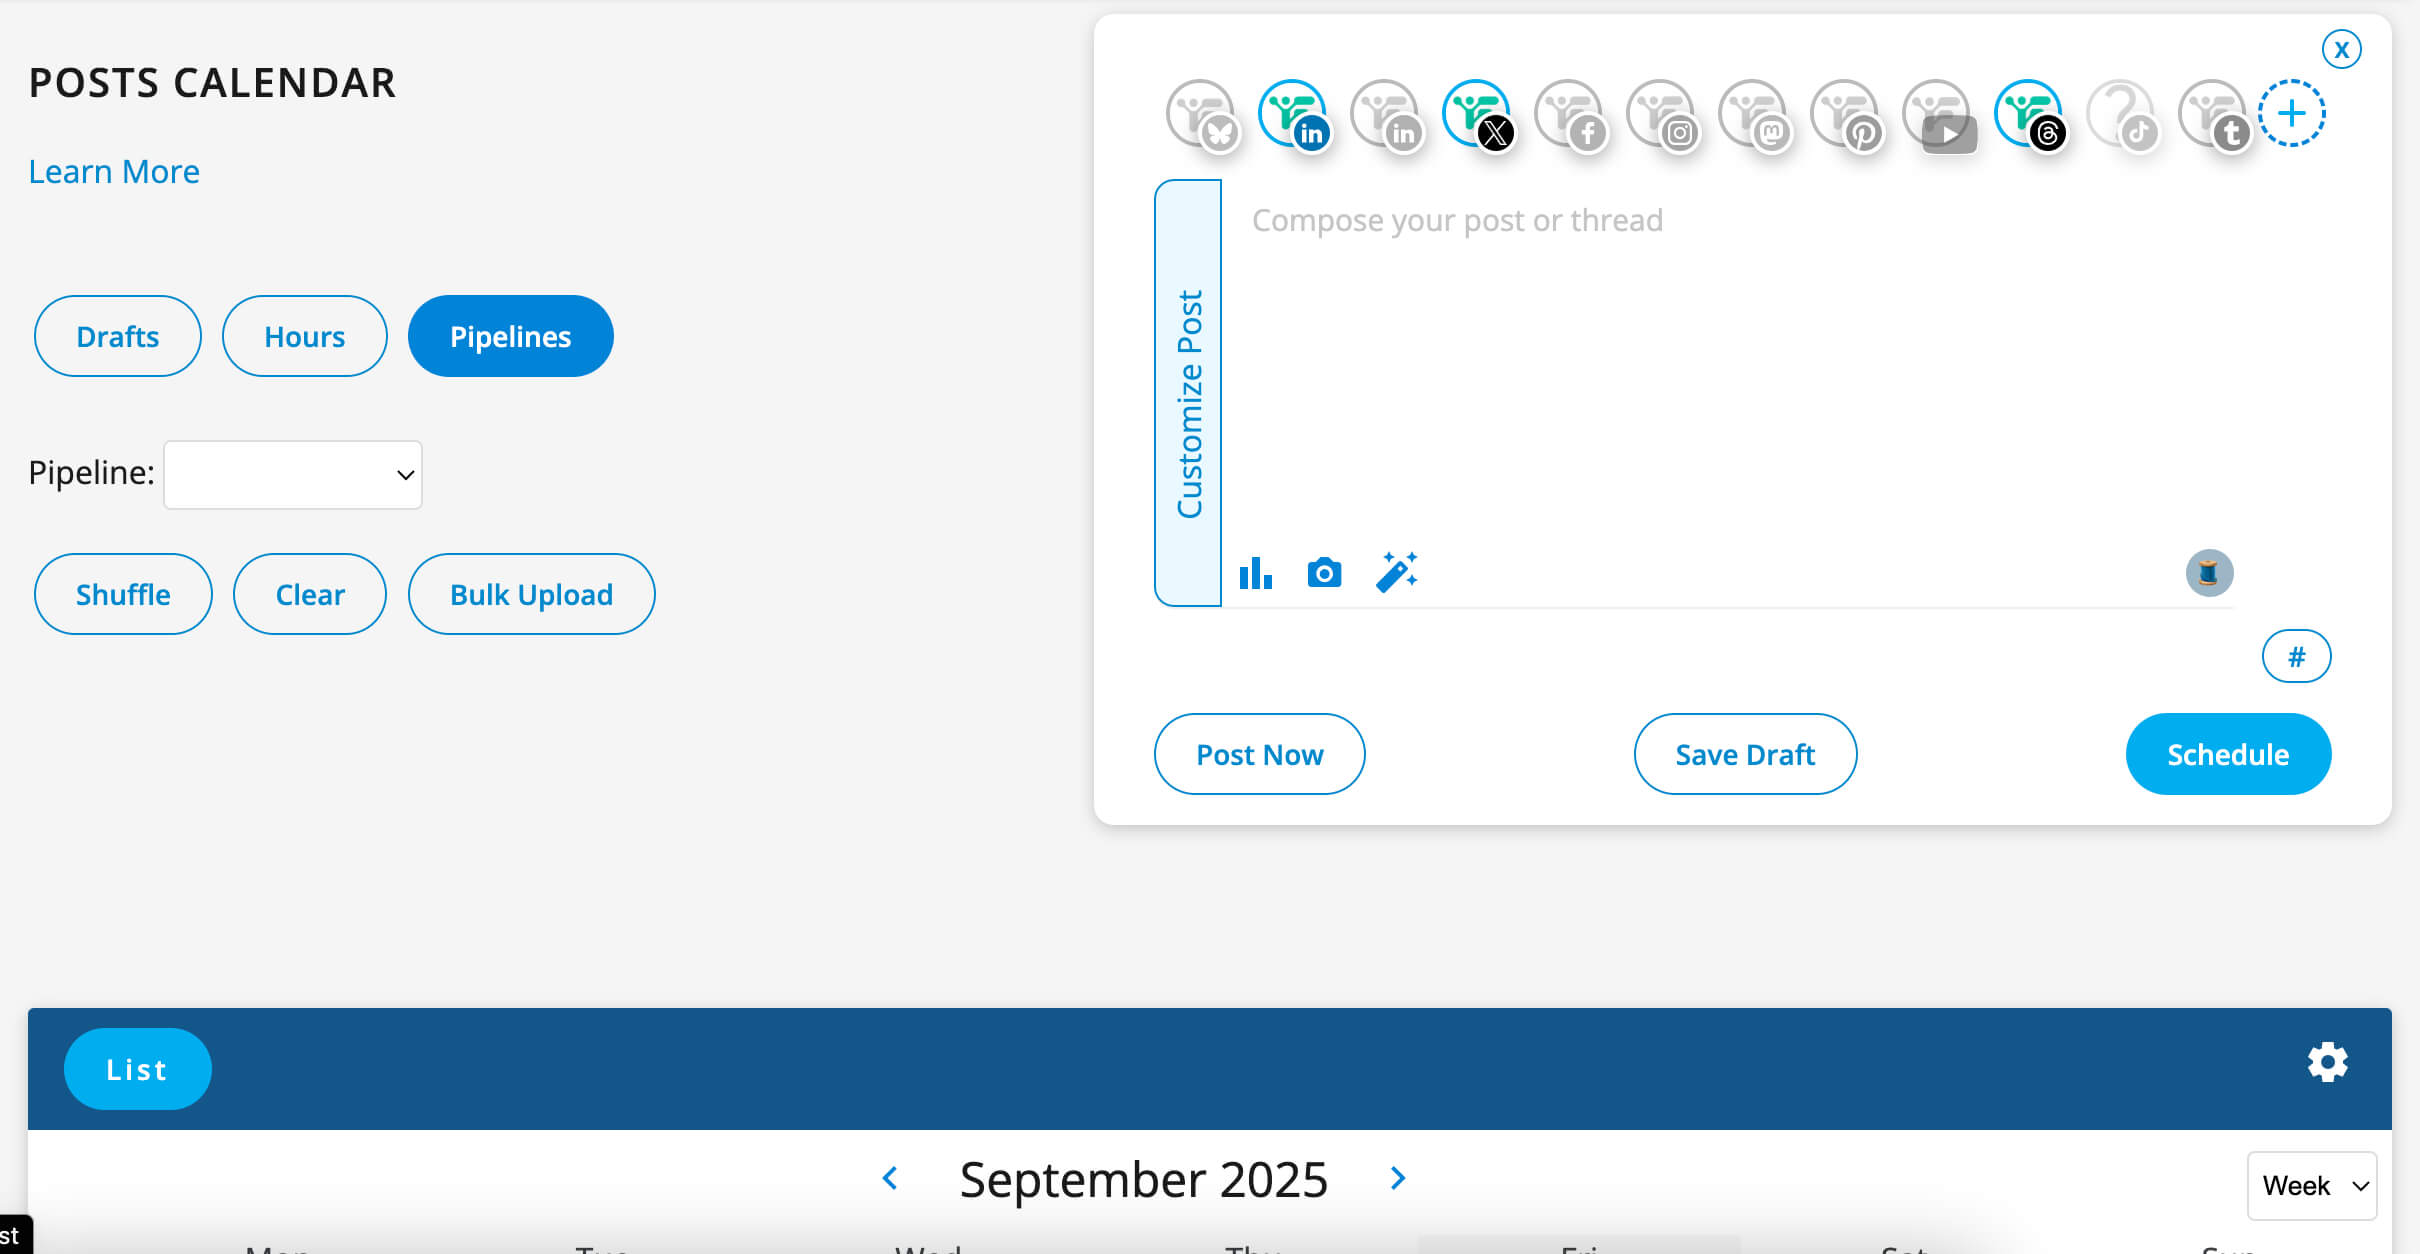
Pipelines are just color coding posts in your content calendar by category. Each of them has their own schedules:
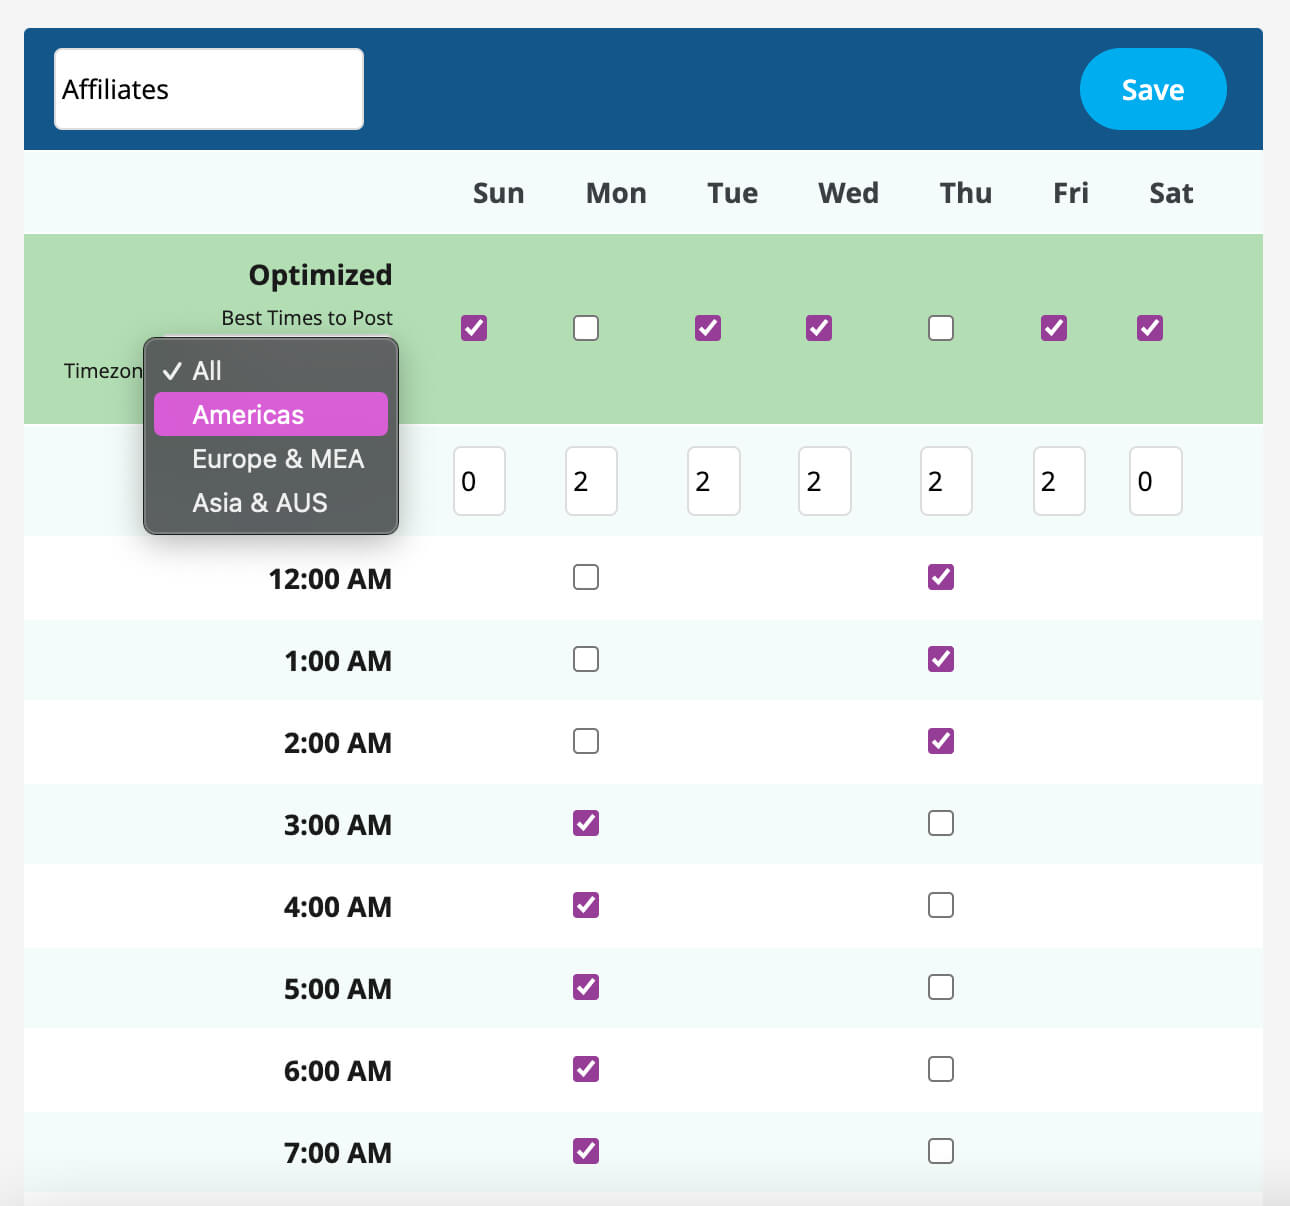
Step 3: Pick the schedule you want for your affilliate posts.
Here’s the “Hours” section where you edit your pipeline’s schedule, like 2 posts a day, Monday to Friday, for example.
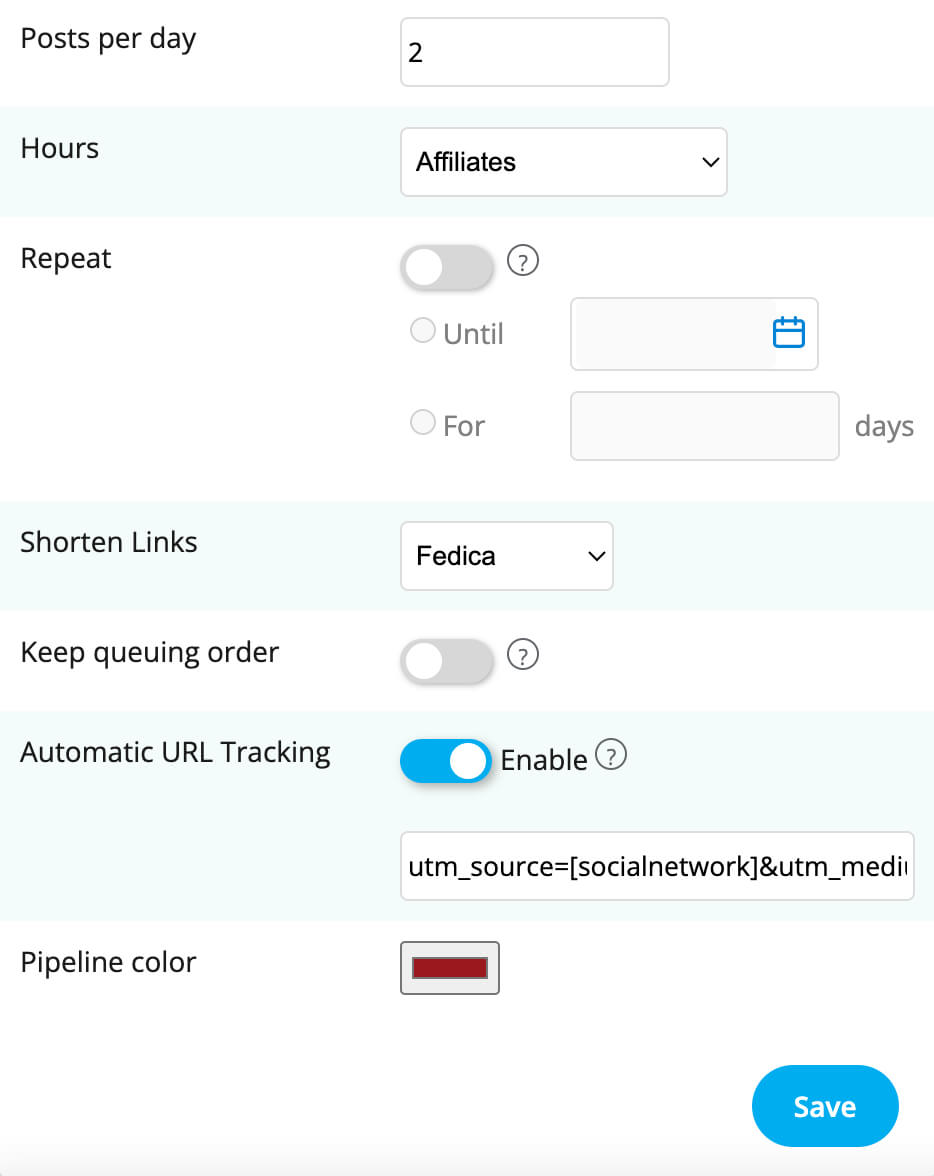
In the Pipeline’s section, see that this Affiliate pipeline uses that Affiliate schedule we just created? This is how much control Fedica gives you.
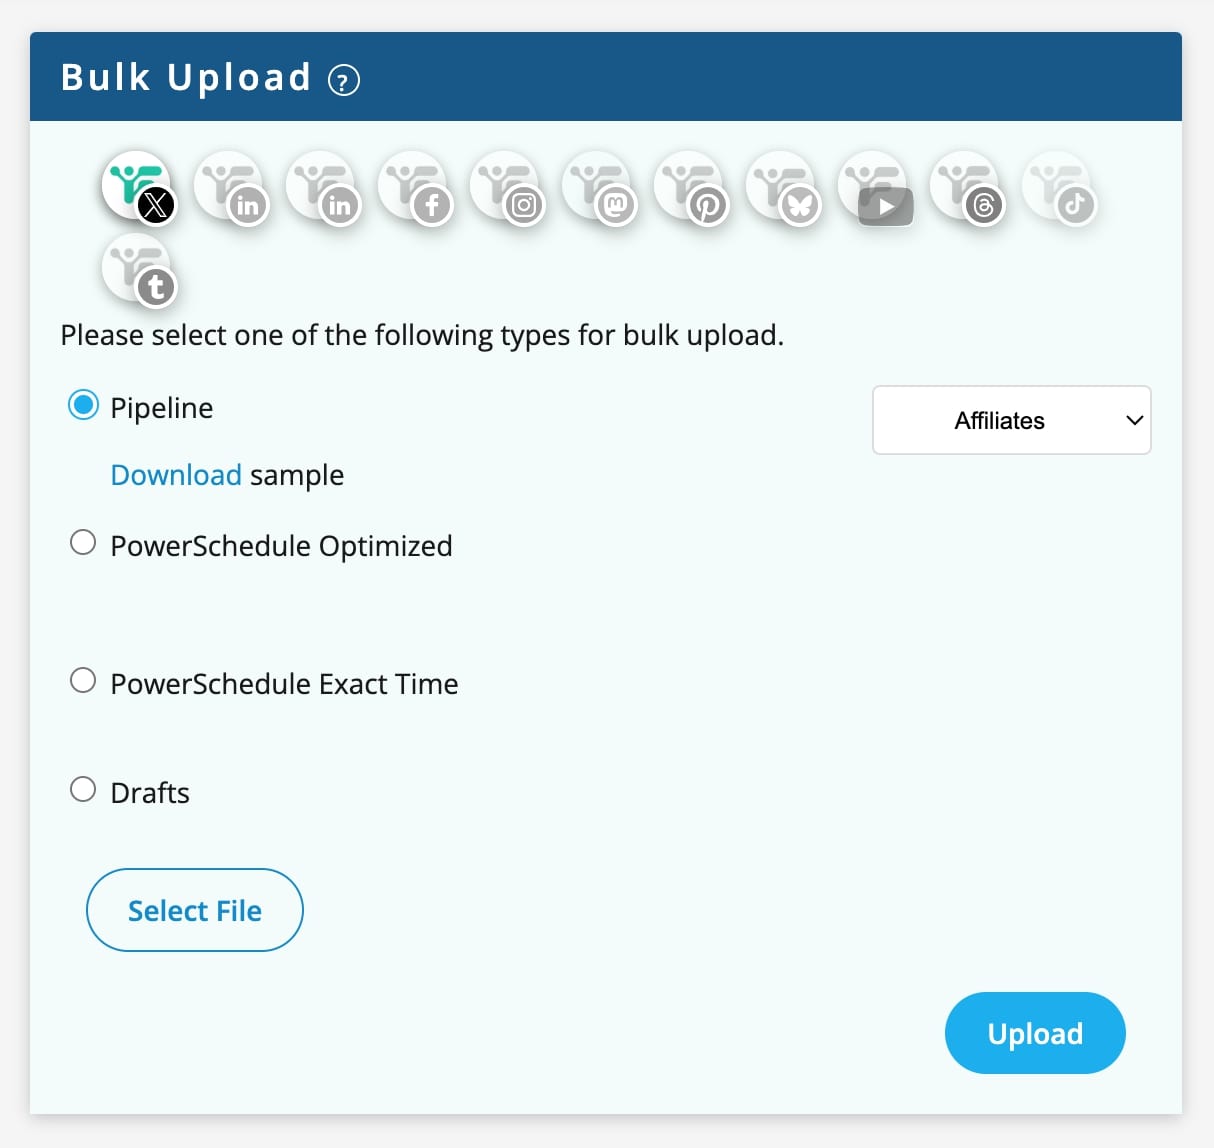
Now, add your Bulk Uploads CSV file to that Affiliates Pipeline!
Note: Are you a pro with Excel? Skip to the next section to Bulk-Add your Affiliate Code to each post before uploading your CSV file! If not, we can edit each post individually to add your code to the links.
PowerSchedule Optimized: Adds to a specific time interval,
PowerSchedule Exact Time: Adds to a specific time interval, with specific hour, minutes and seconds in a day,
Drafts: Does not get added to the content calendar, and saves all to drafts.
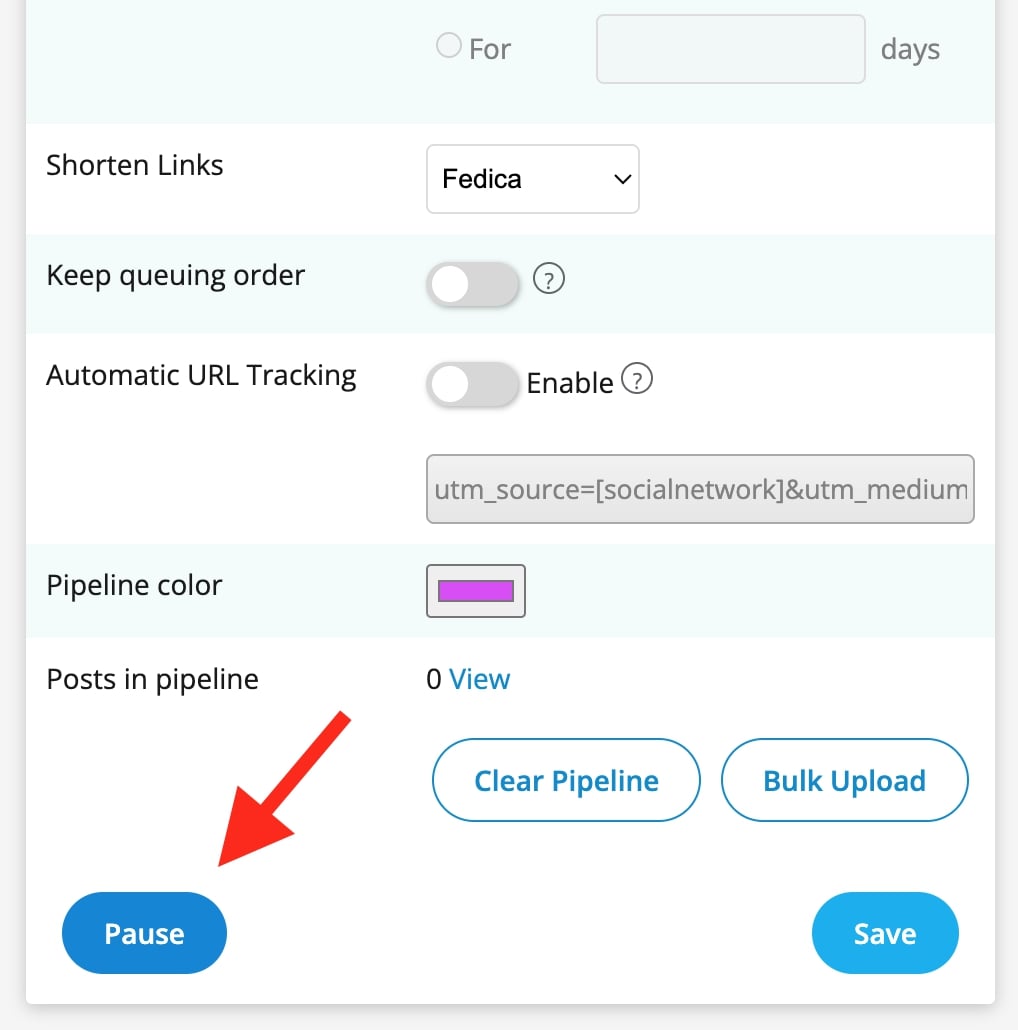
Quick Tip: Pause your pipeline to save your posts to your automatic schedule if you need more time to customize them before posting!
Step 4: Upload your CSV file.

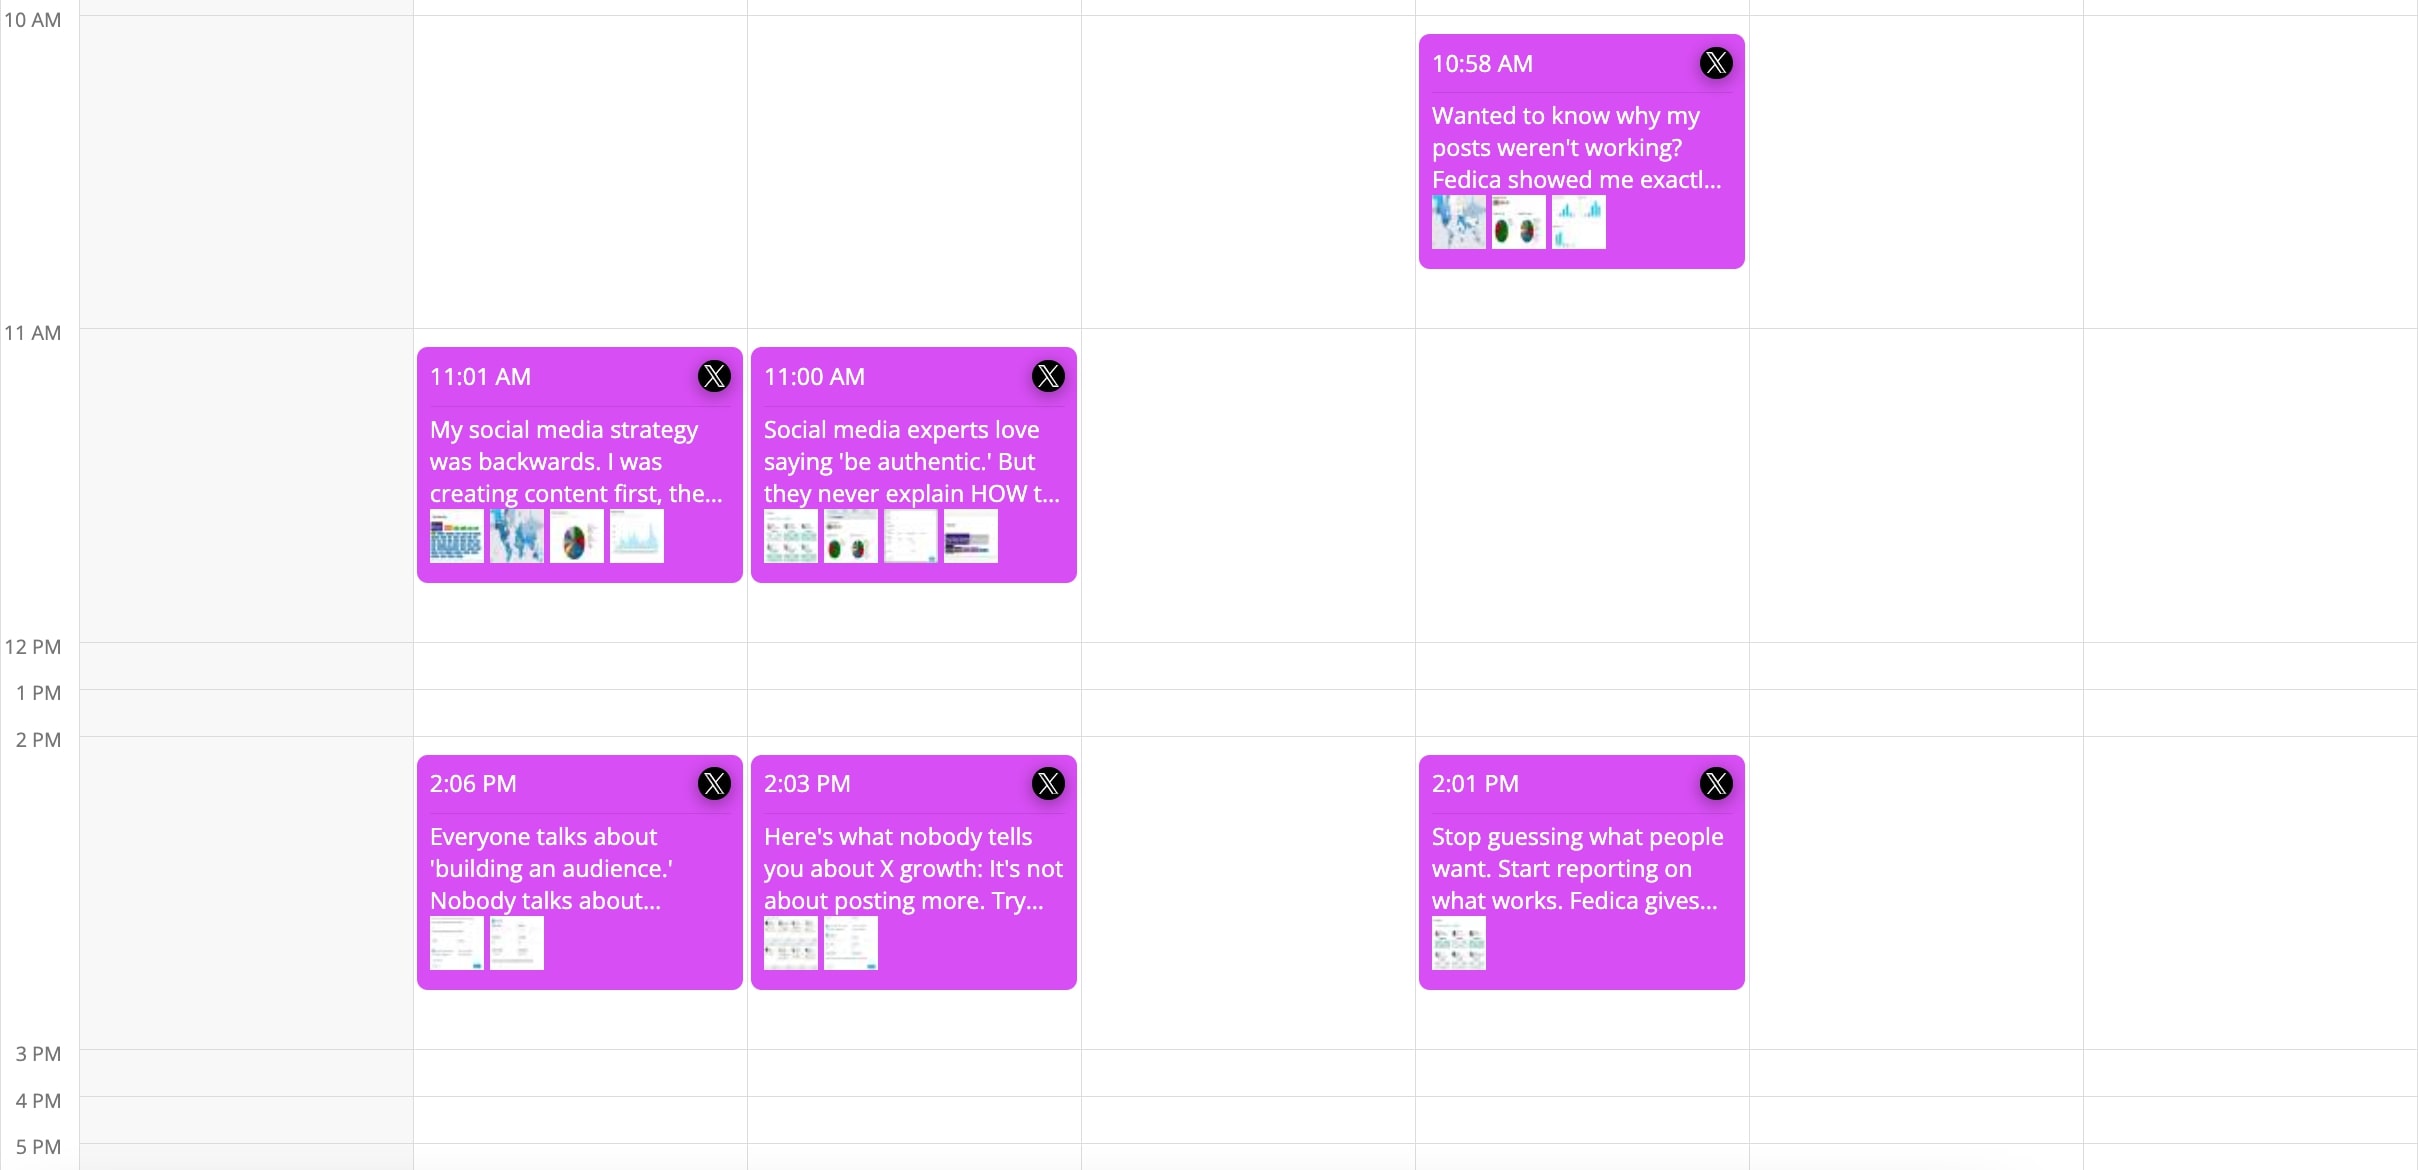
Your posts will now show in the Posts Calendar in the Publishing section.
Note: If you paused your pipeline, they will not show in the calendar, but till show if you filter your Posts Calendar by Pipeline.
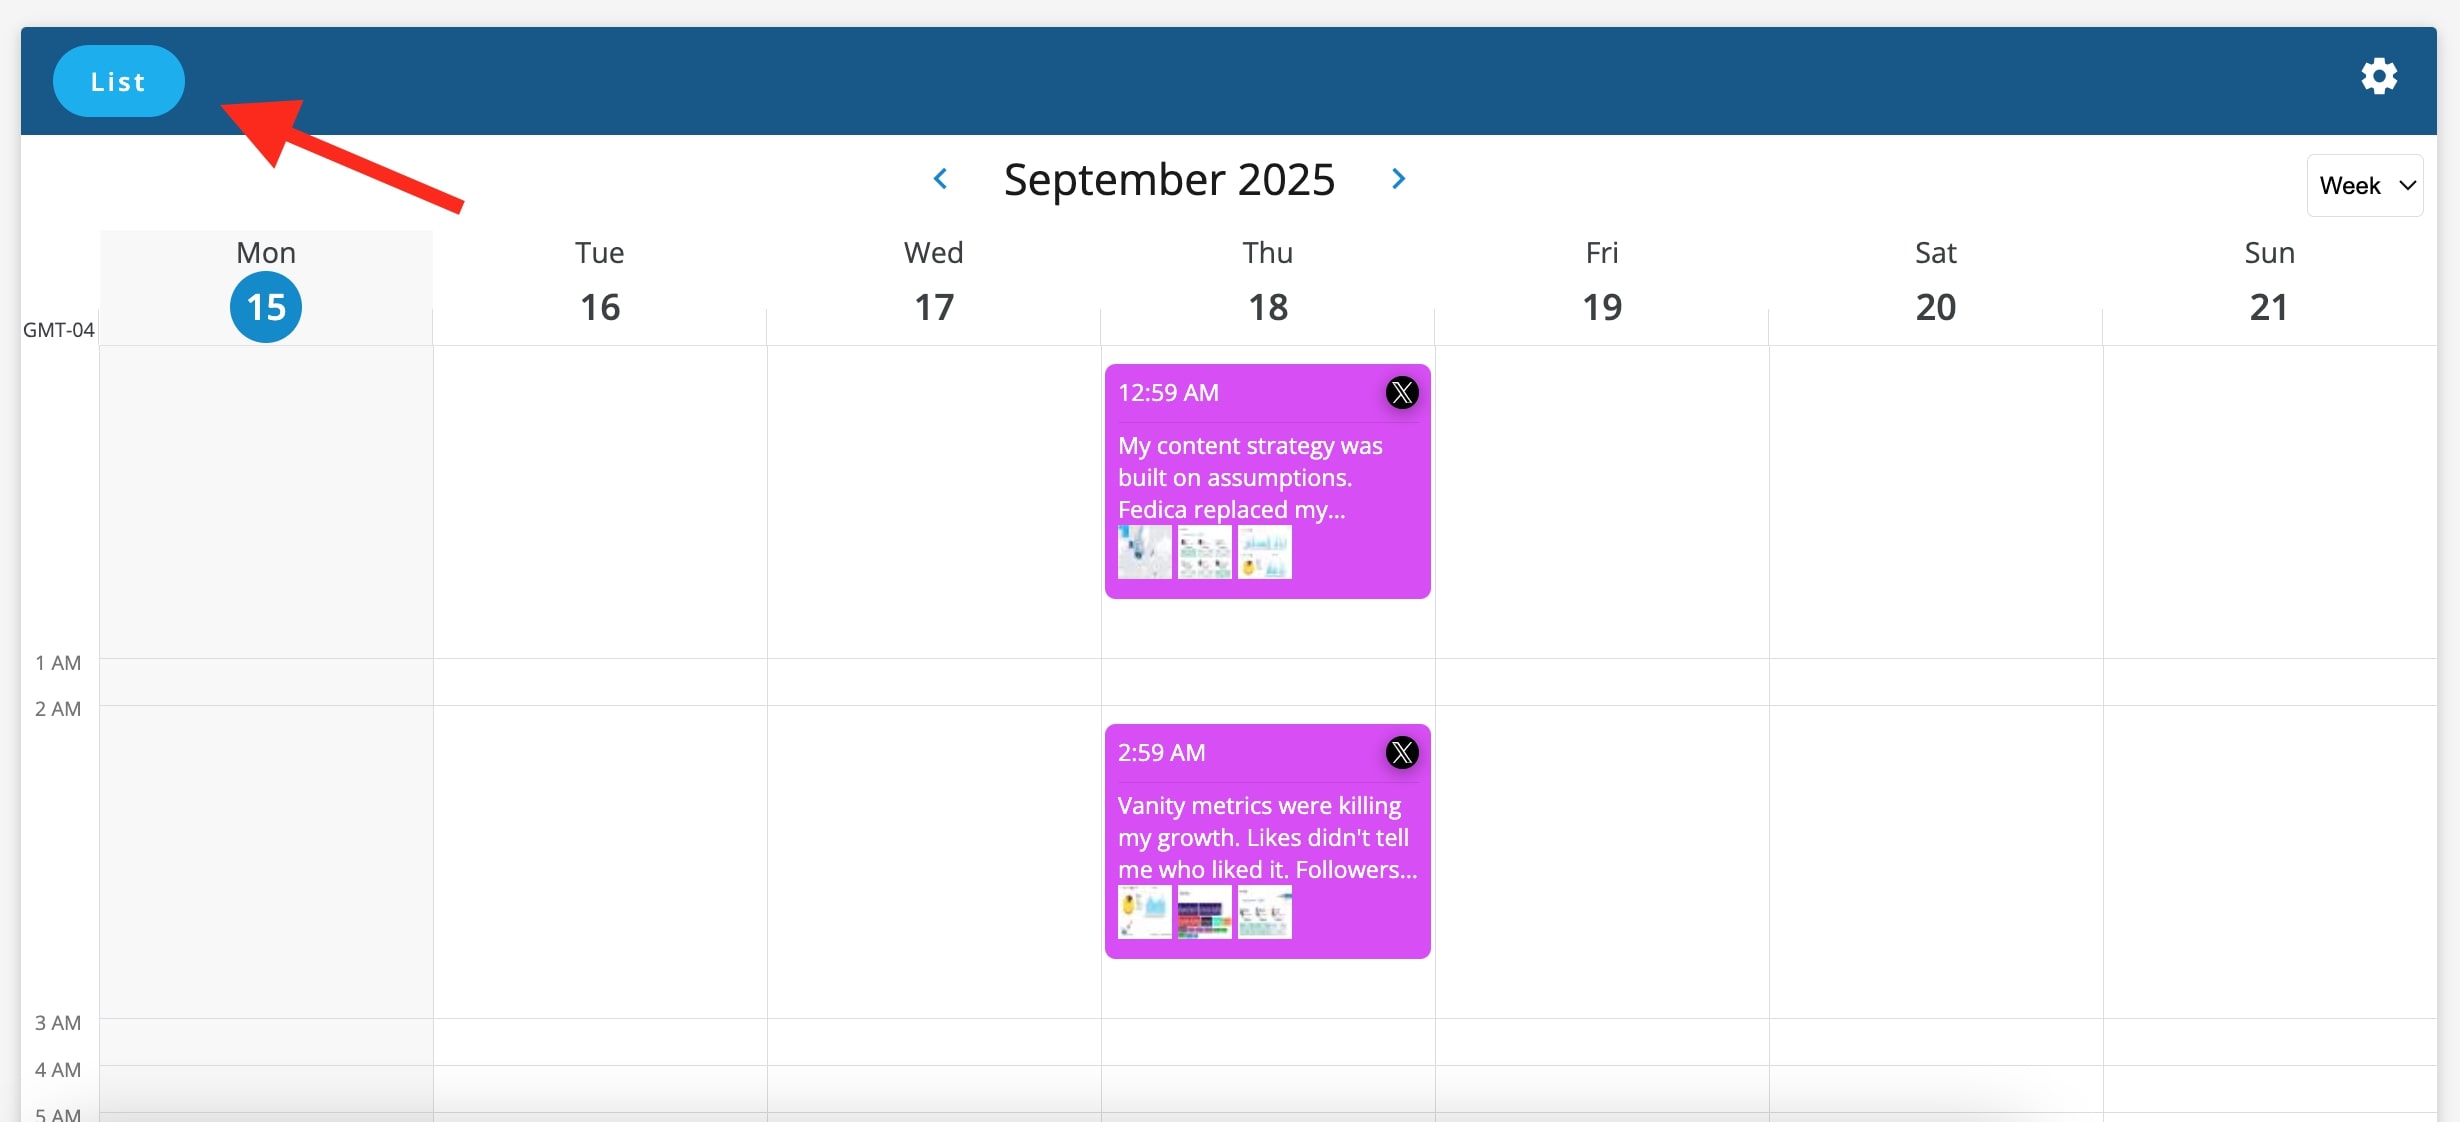
Note: Click the List View to see all your posts in order, rearrange them and edit them easier too.
Step 5: Add your Affiliate Code to your posts.
Edit posts easily in List View to add your unique Affiliate Code to your post links.
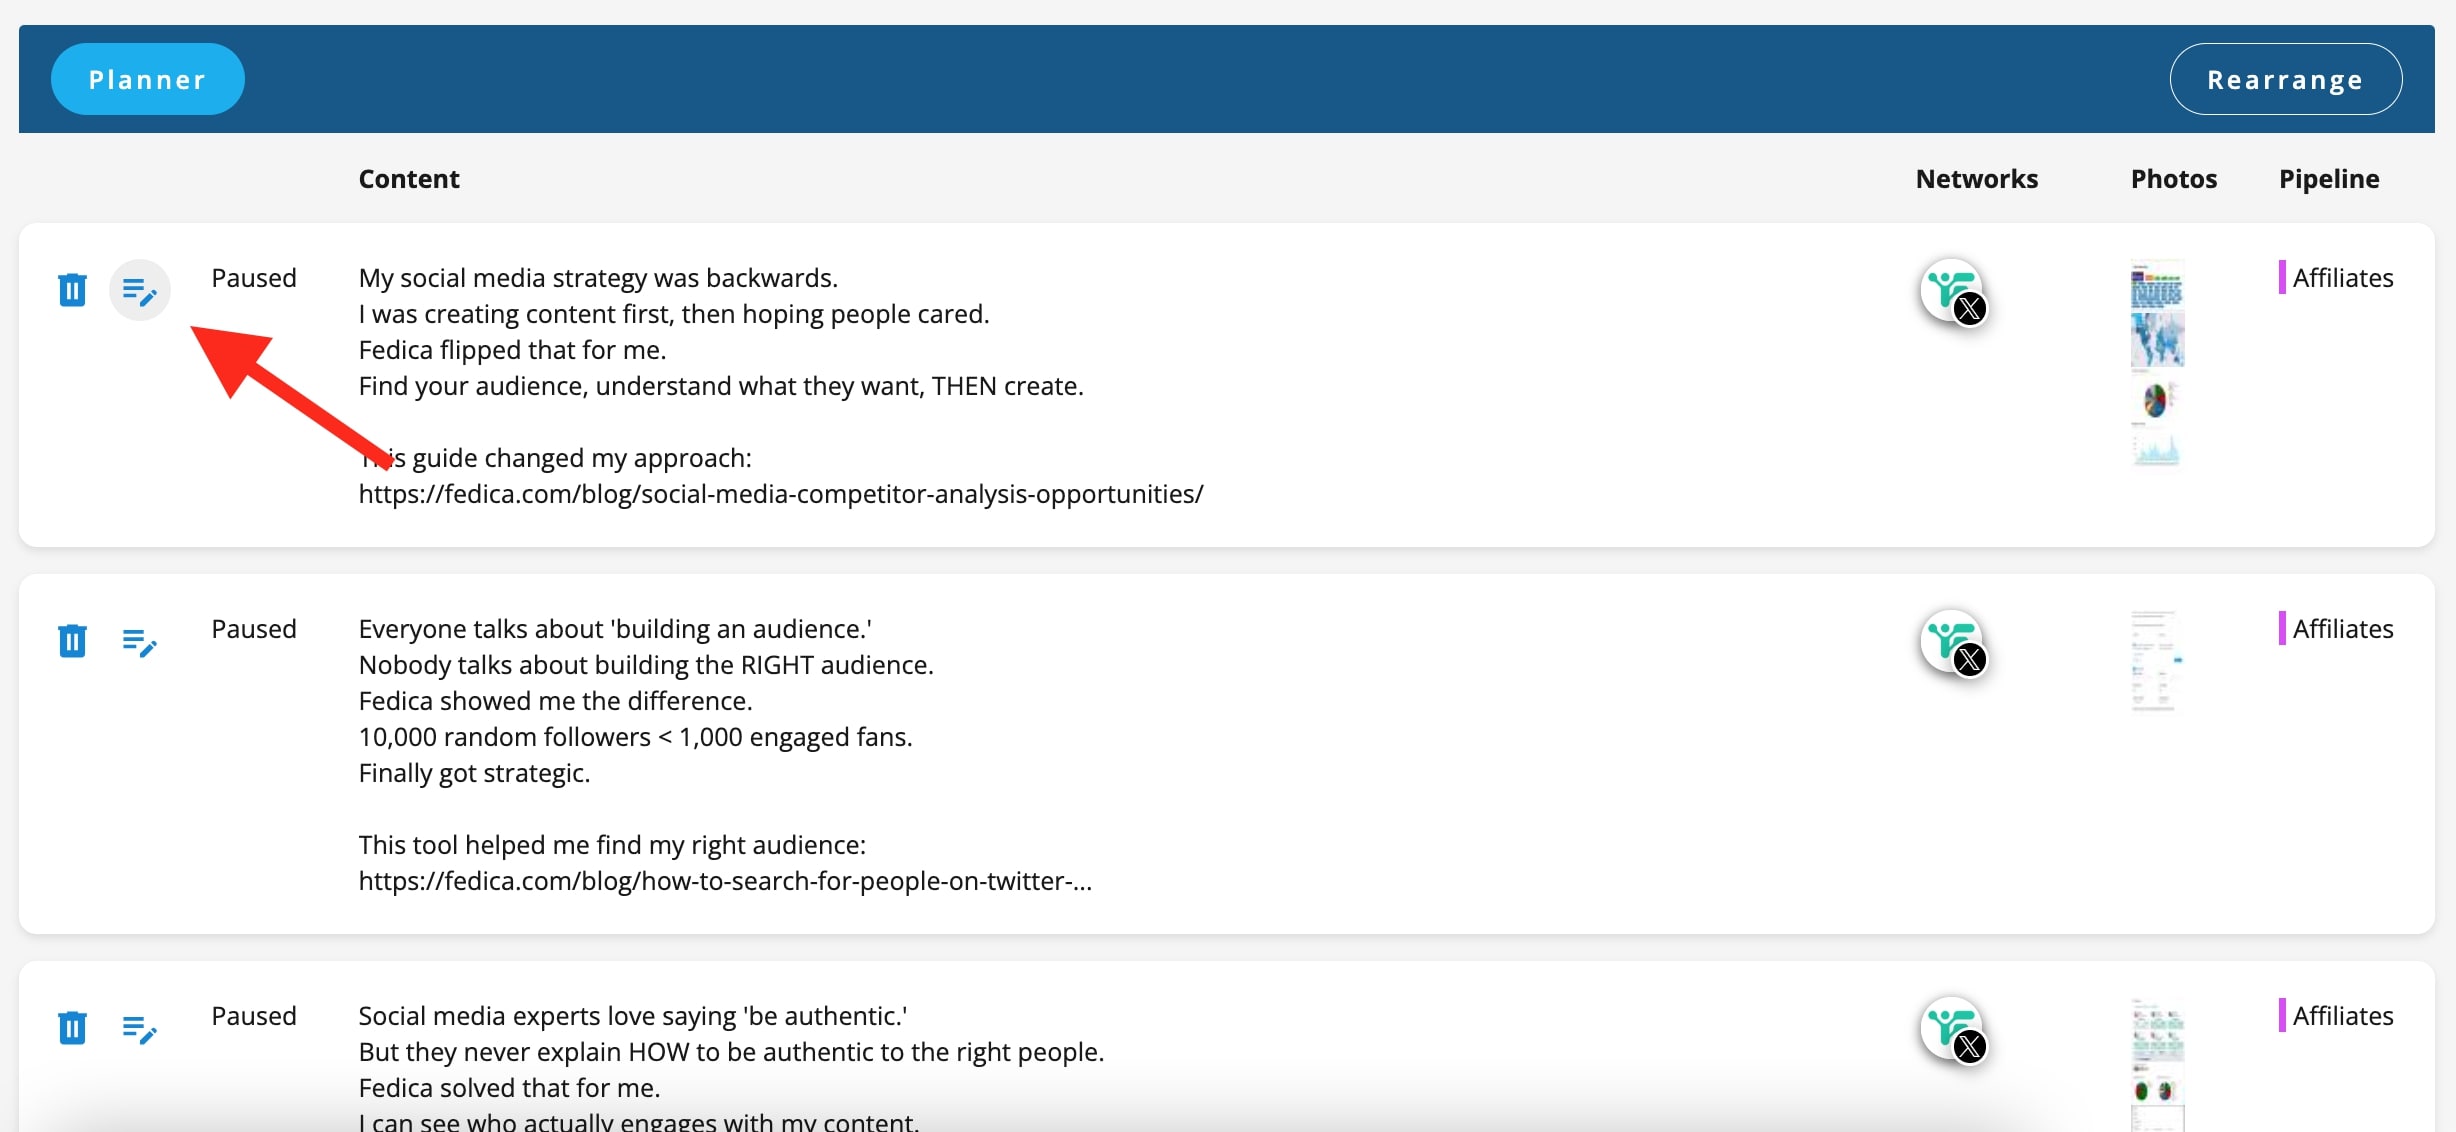
Simply add your Affiliate Code to the end of any Fedica.com link to track your earnings!

IMPORTANT: Before uploading, you must add your unique affiliate code to the end of each link in the post text, unless you choose to edit each post individually in Fedica.
Your code format: ?_by=yourcode
For example, if your code is “example”,
a link would look like: https://fedica.com/analytics?_by=example
This ensures you get credit for every conversion you get.
Now, resume your Pipeline in the Pipeline settings, and remember to balance your posts with other content!

Excel users: See how to add your affiliate code faster with a bulk edit in Excel:
How to Bulk-Add your Affiliate Code to a CSV in Excel!
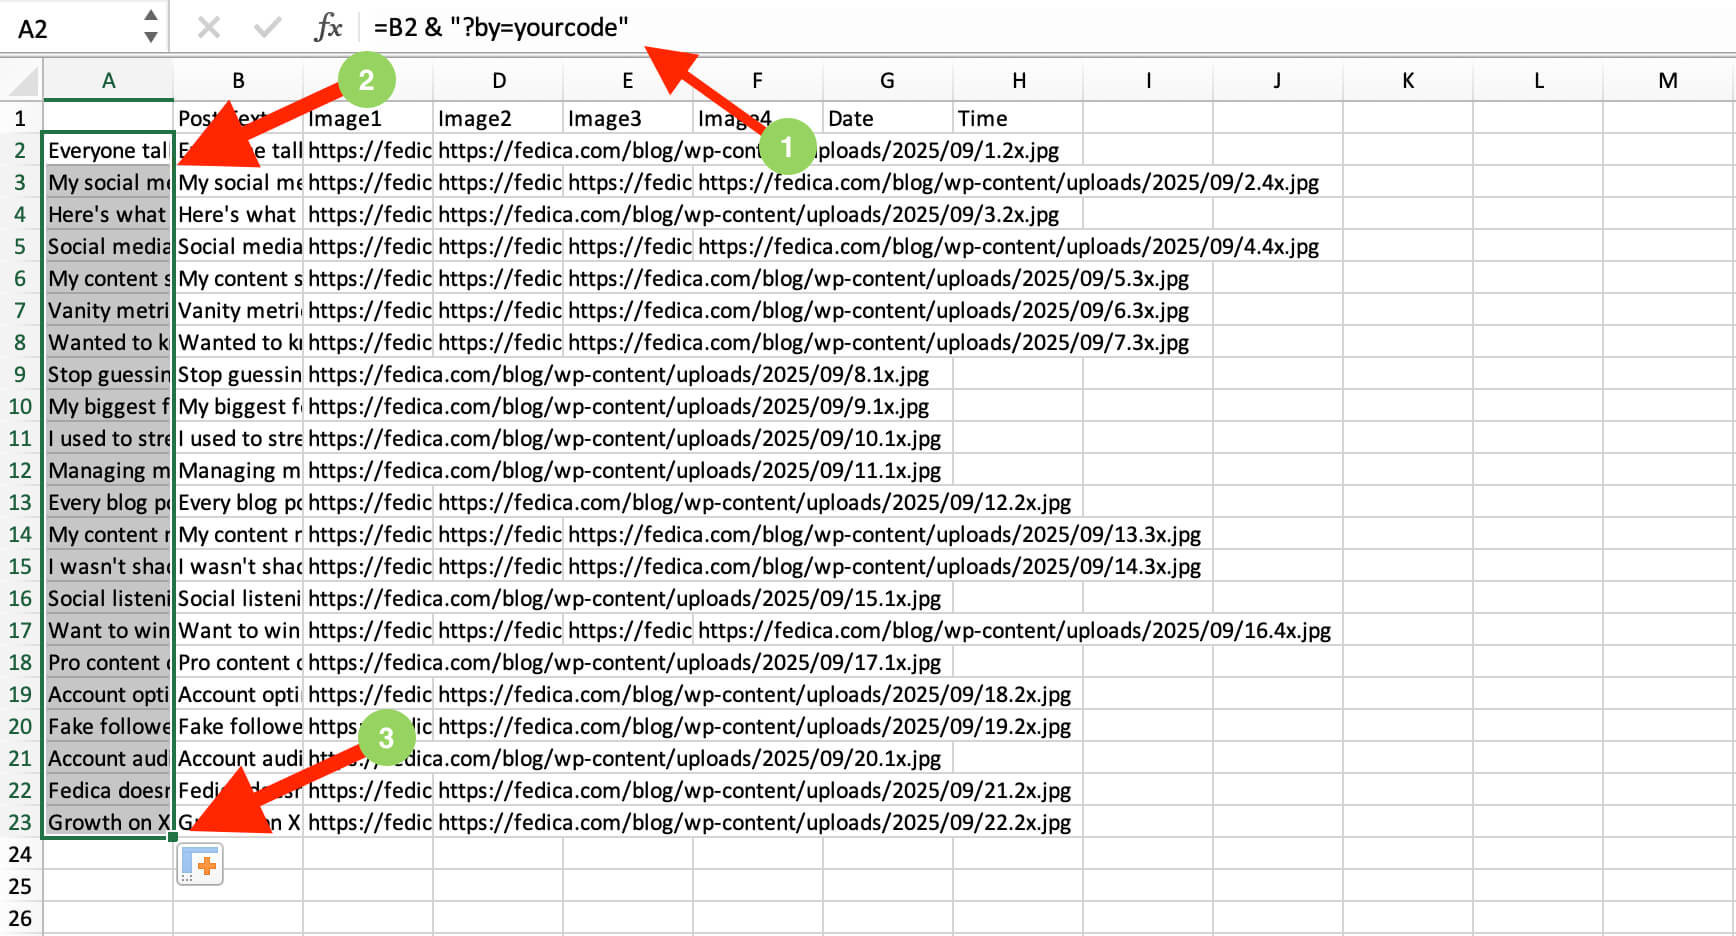
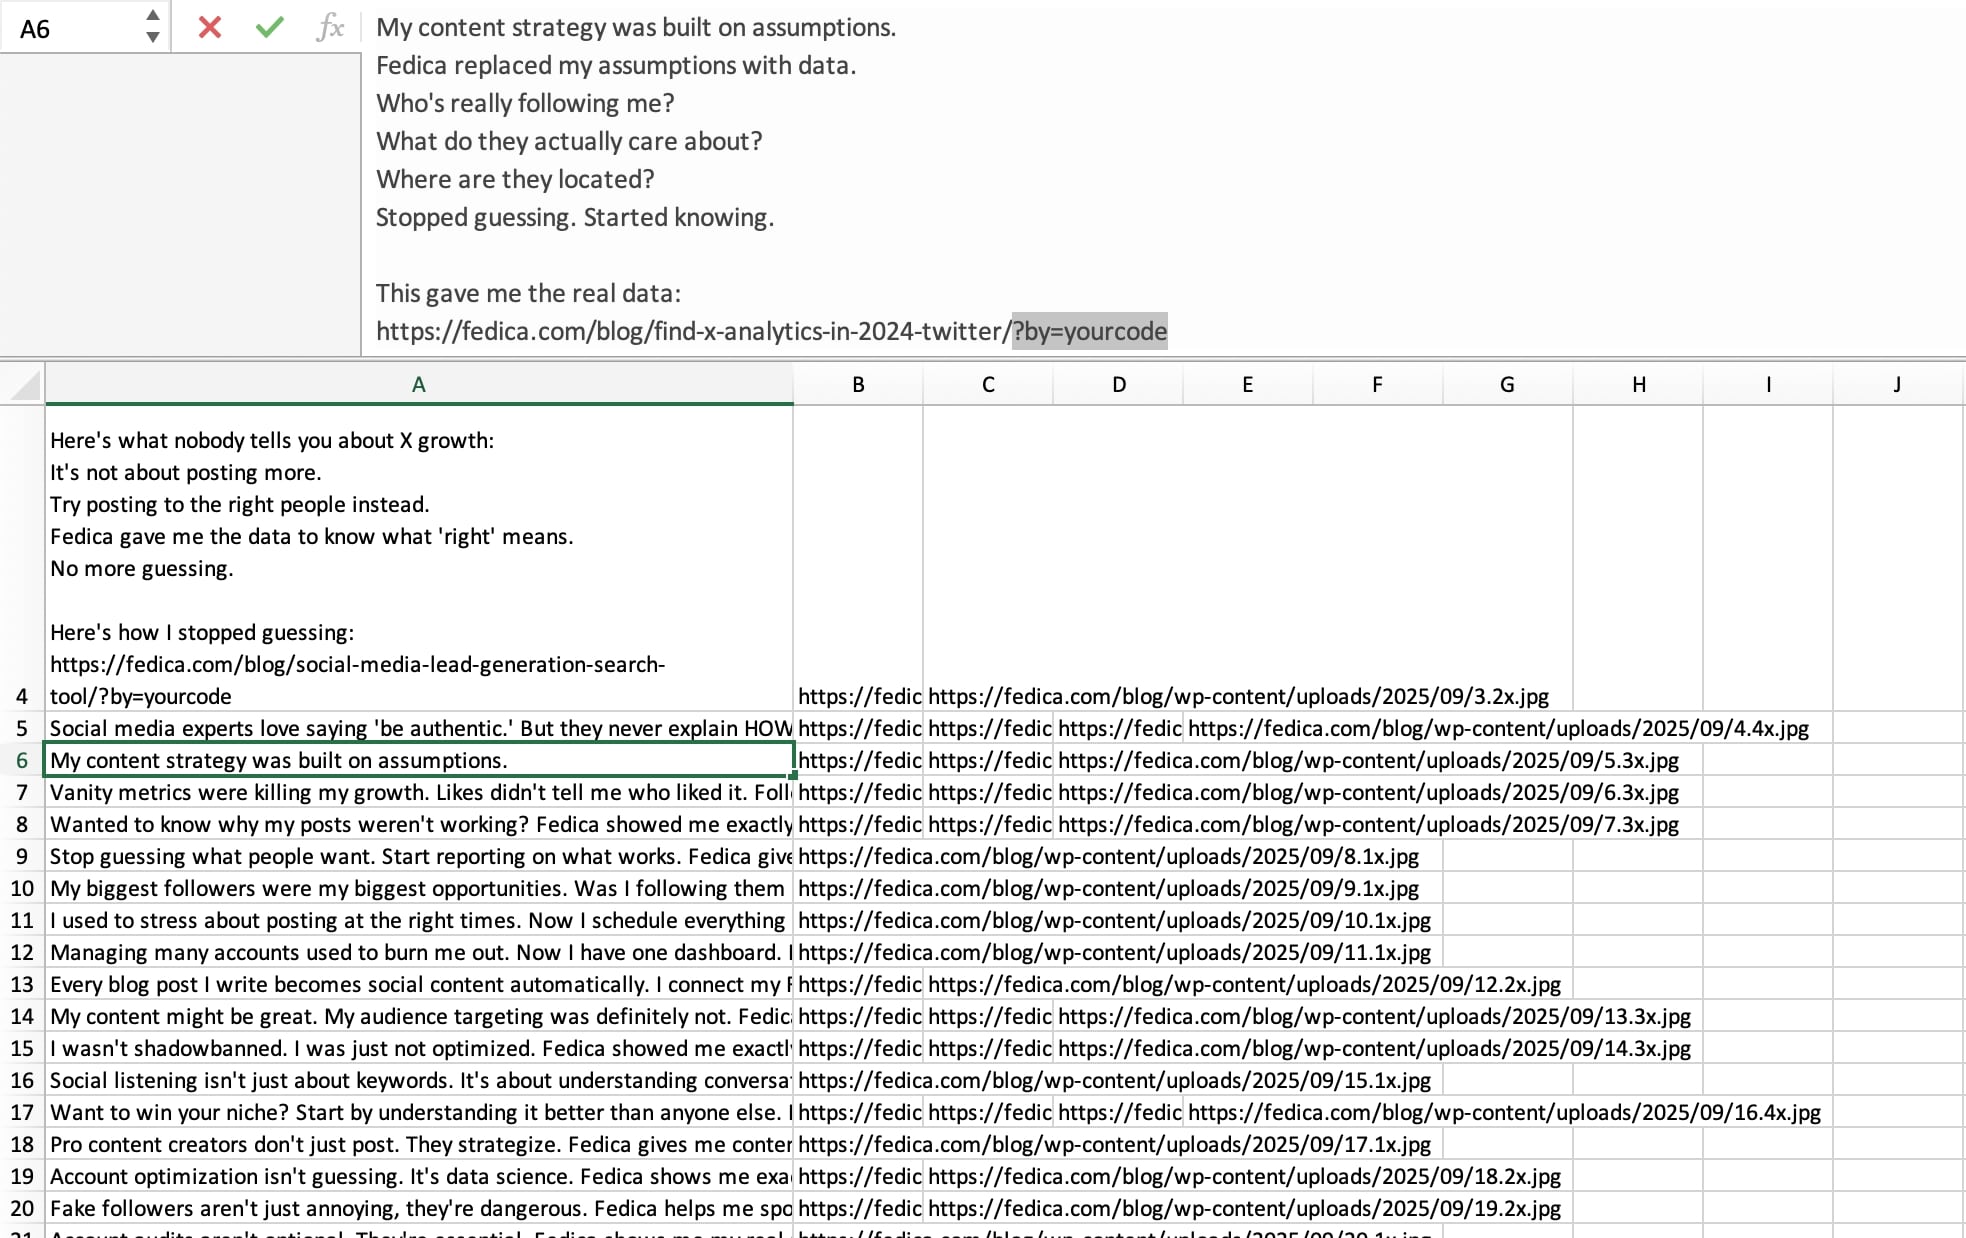
Before uploading your CSV file of posts, open it in Excel, then insert a new column to the left.
Use this formula which equals the content from the B column, AND adds your unique code to the end of the content, which would be the end of your post’s link:
=B2 & "?by=yourcode"Then drag down the bottom right square to copy the formula which will adapt to each row, each adding your Affiliate Code.
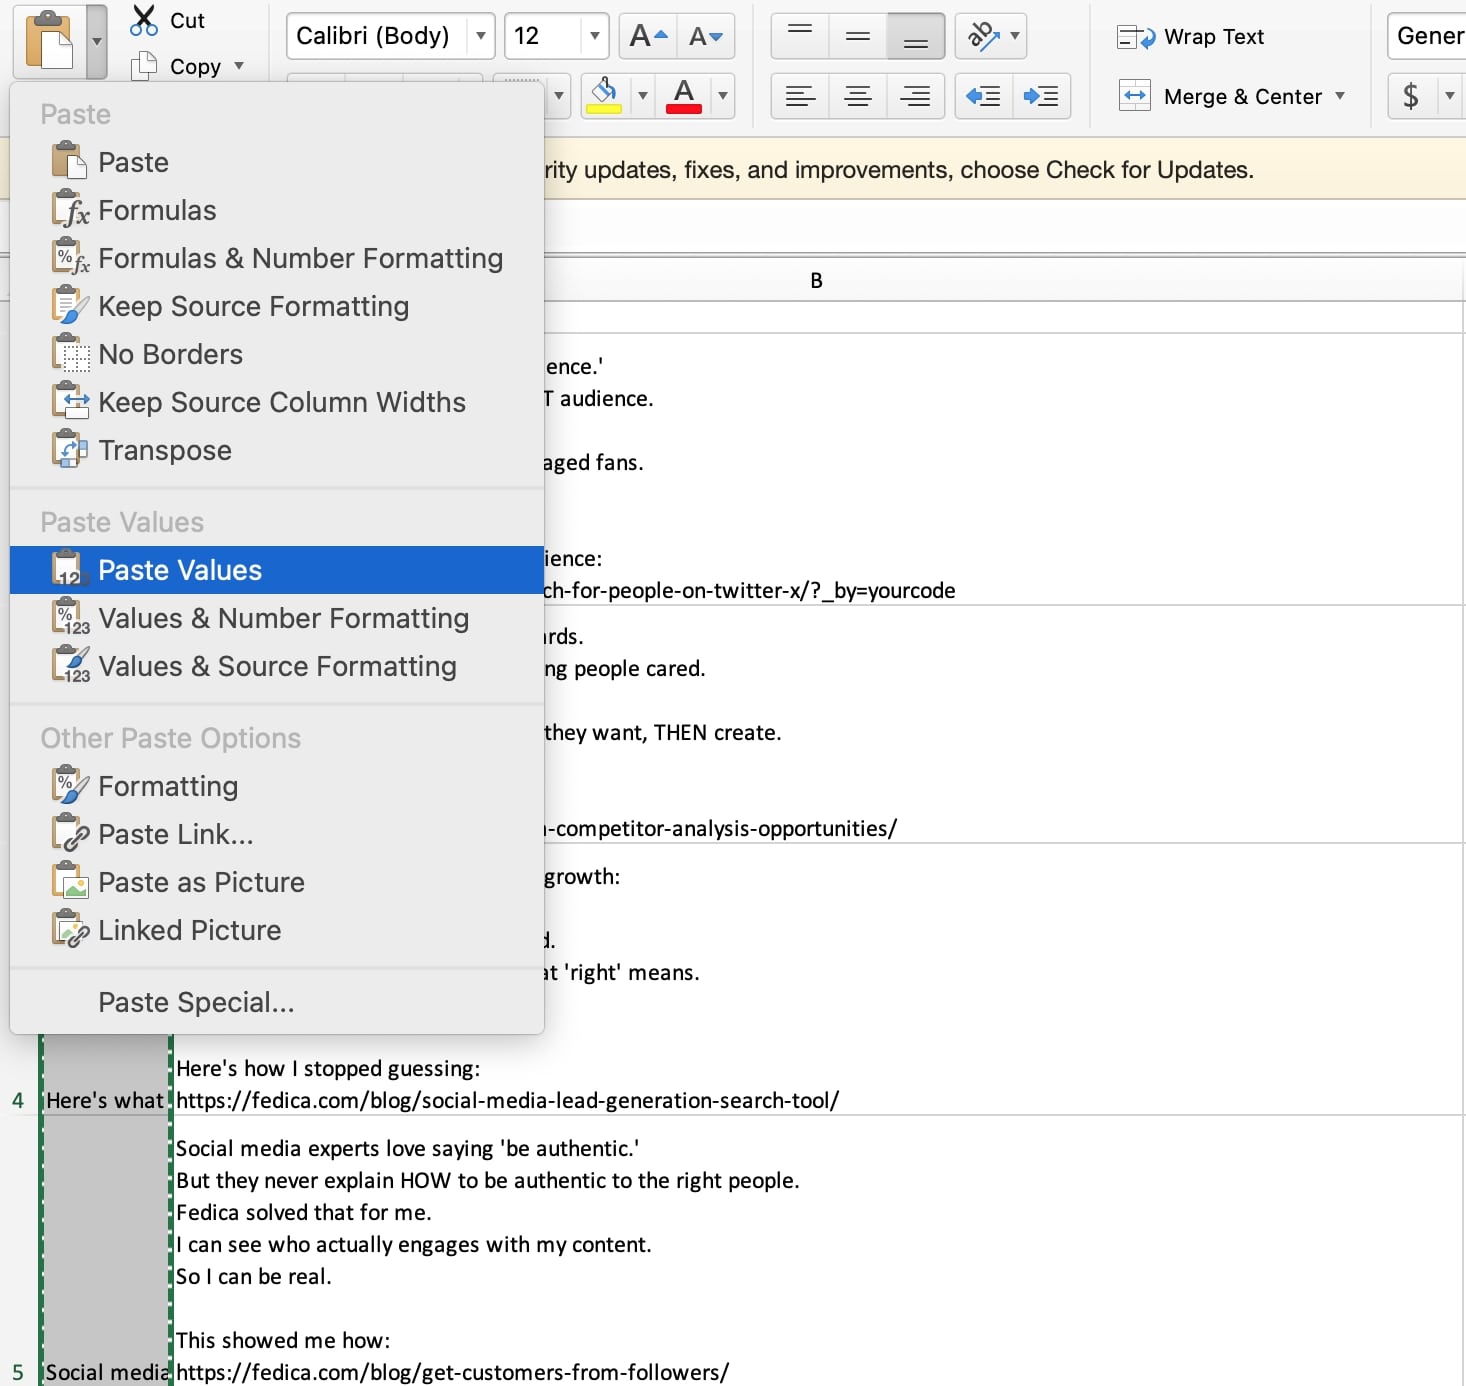
Copy that entire column A, then paste the same column as “Values only” to keep the text posts without the Excel formula.
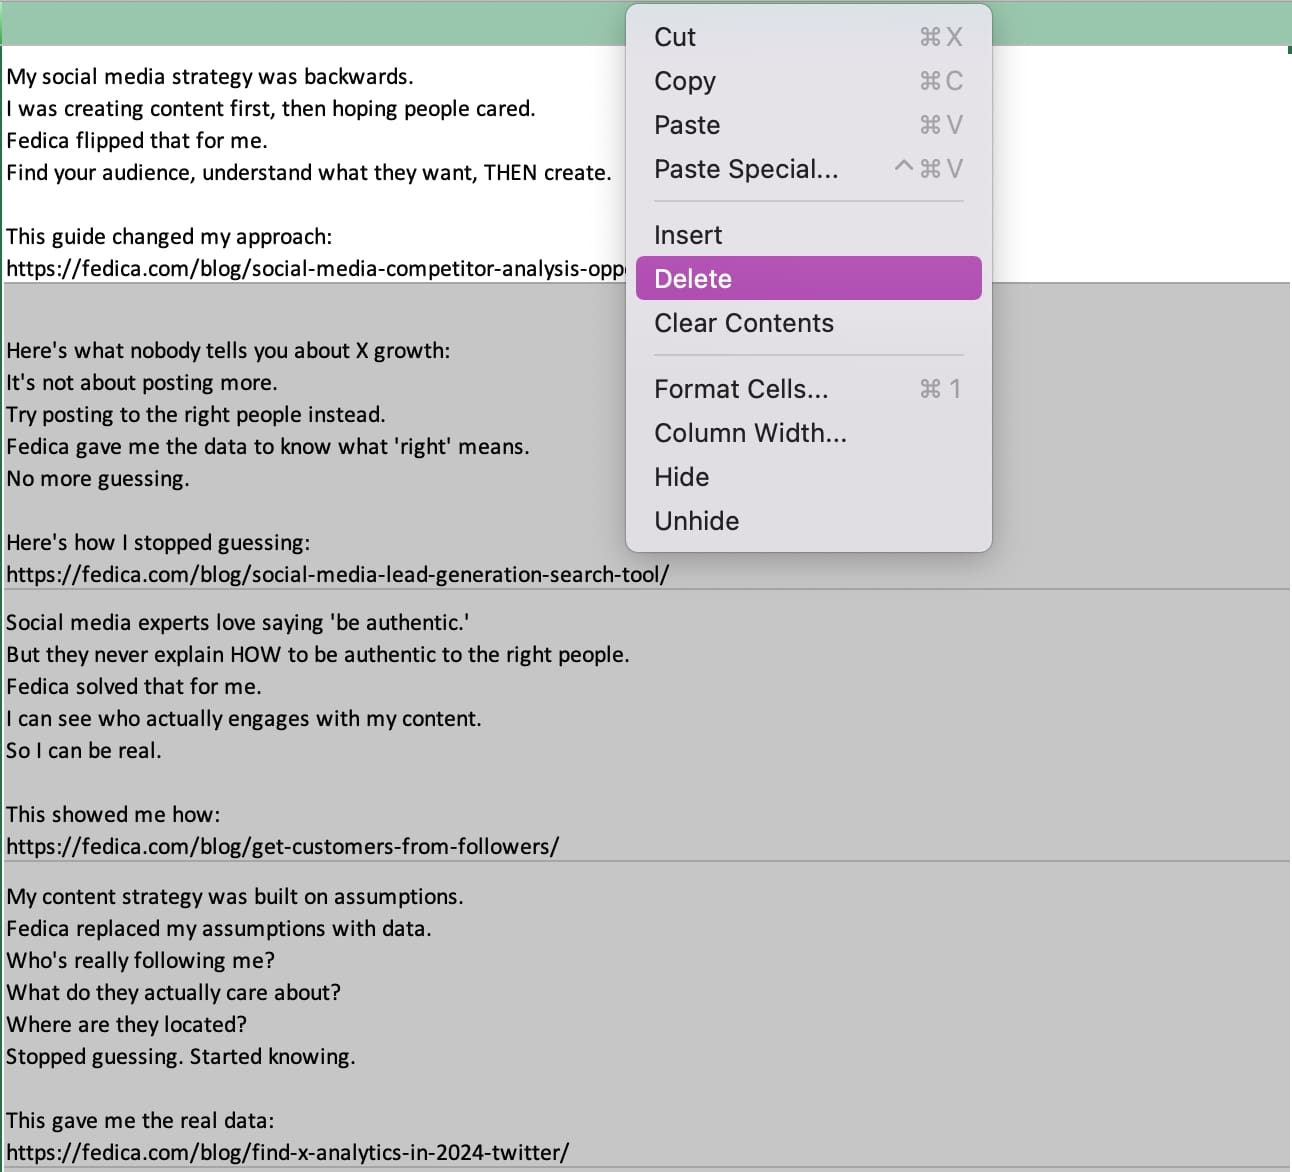
Finally, delete the column B, so column A becomes the only text posts with your Affiliate Code, ready for upload to Fedica!
Make sure Column A now has all your posts and your affiliate code attached at the end with the link:
Upload your CSV file to Fedica!
Pro Tips for Success
- Customize when needed
Feel free to modify posts to match your voice - Test different schedules
Find what works best for your audience - Monitor performance
Use your analytics dashboard to track what’s working - Stay consistent
Regular posting builds trust and engagement
Need Help?
If you have any questions about setting up your affiliate account or using the bulk upload feature, our support team is here to help. Contact us through your dashboard or reach out directly.
Ready to start earning? Download your posts from the Assets page in our Affiliate sign-in page.
Not an affiliate?